Mach One Whip Artistry
  • MACH ONE Whip Artistry
  • About
  • Whip Coach Daniel Trout
  • The History of the Whip
    • Supersonic Whips
  • Classes
  • The MACH ONE Blog
  • FAQ
  • Links
  • Contact
  • Files

The Mach One Model: Putting it all together and digging deeper with Ron R. Lew's Tibetan Wave technique (Part 5 of 5)

4/28/2021

0 Comments

 
Picture
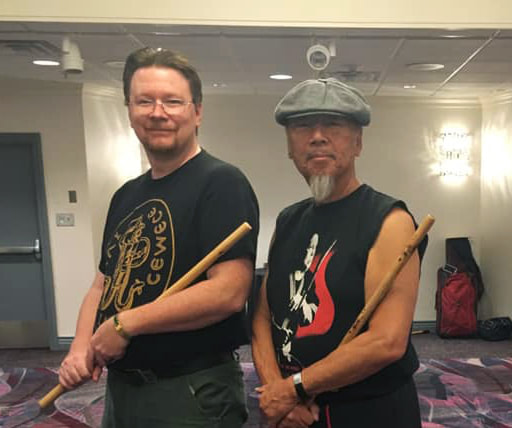
Senior Grandmaster Ron Lew and the author in Las Vegas in 2019. Photo Courtesy of Ramona Falkowitz
...pation!

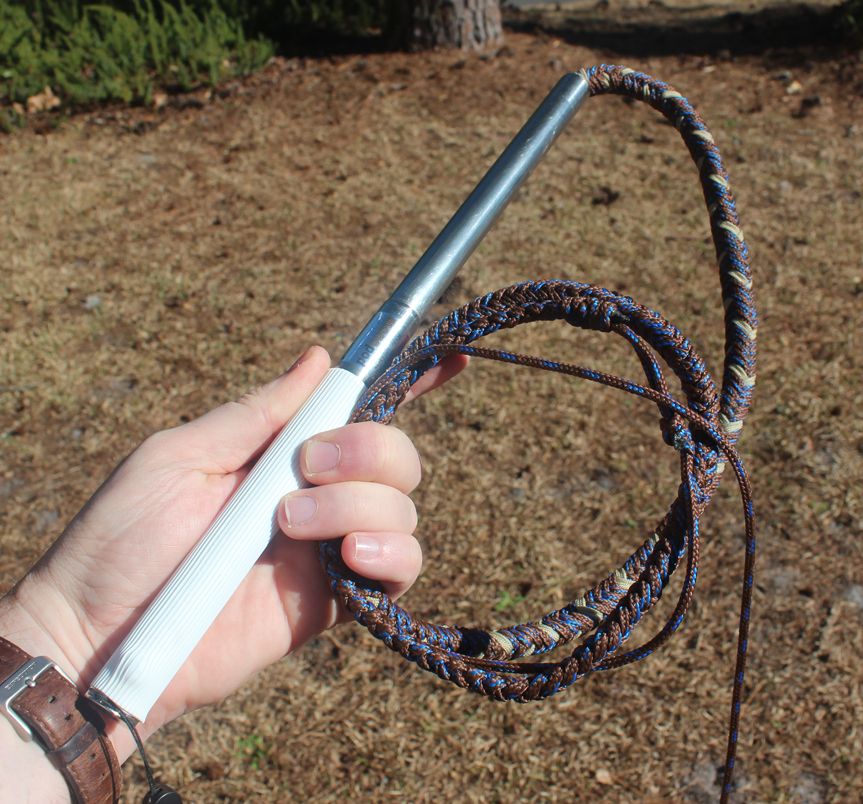
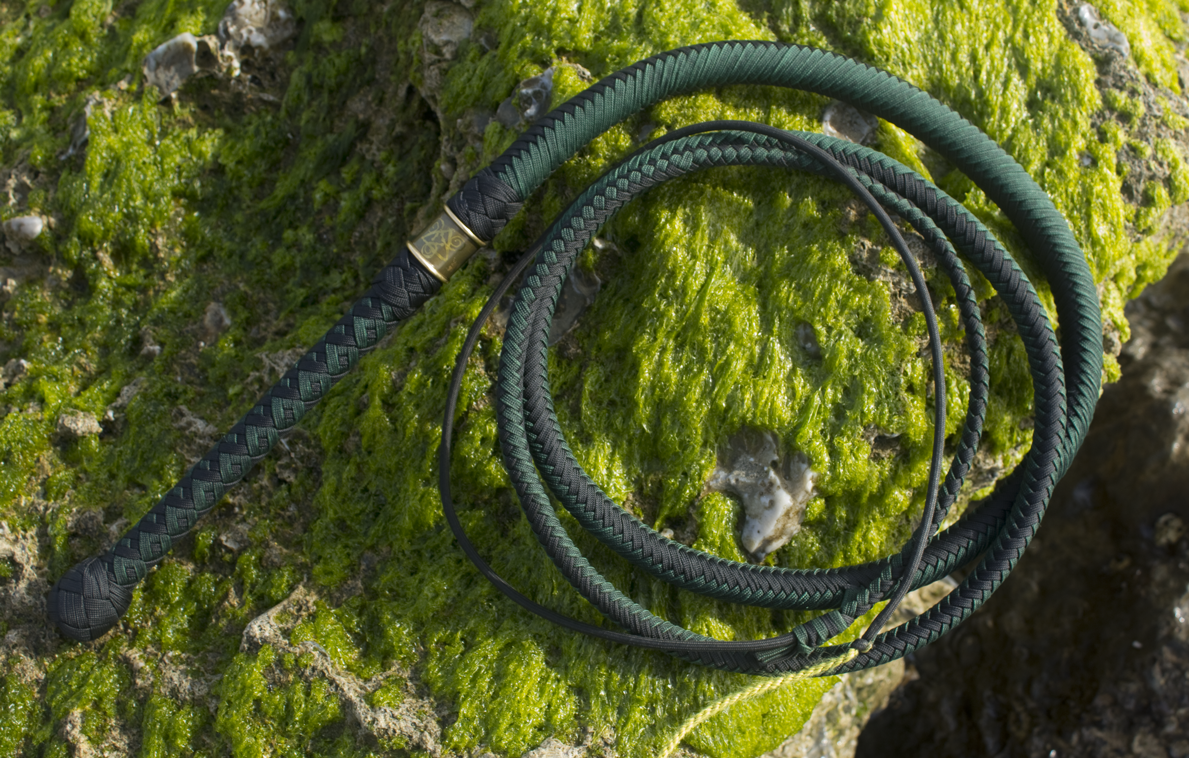
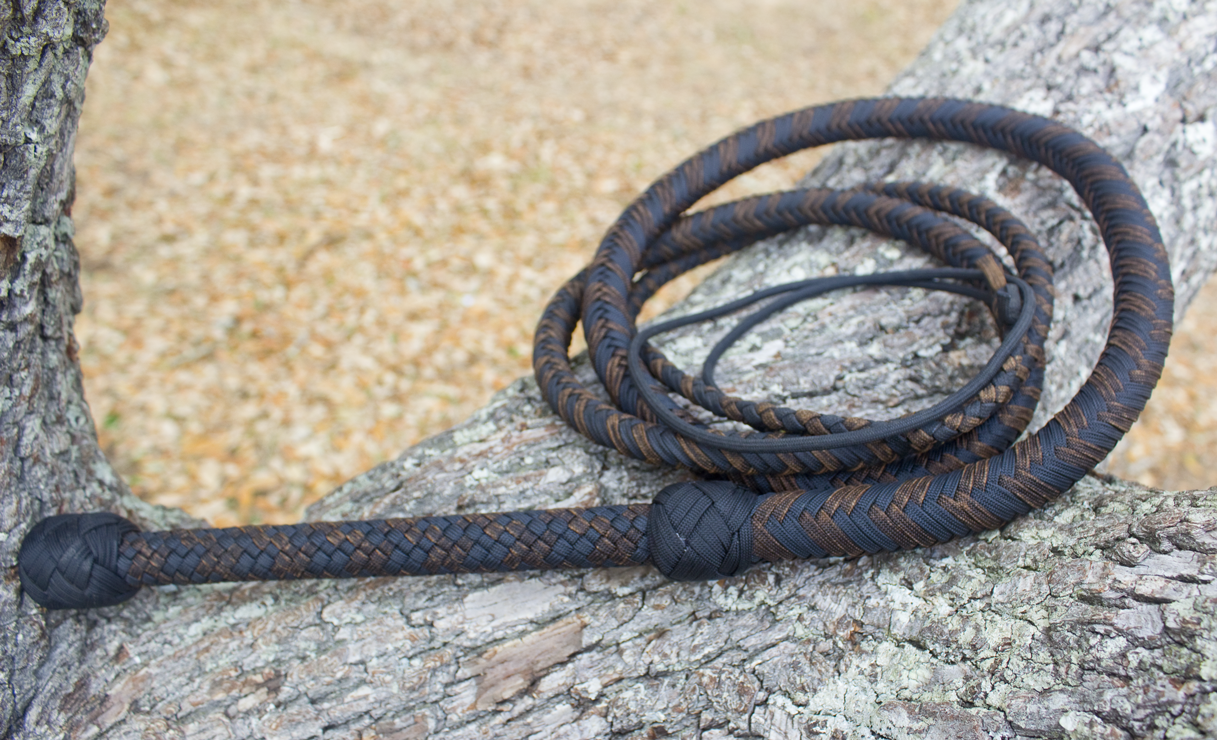
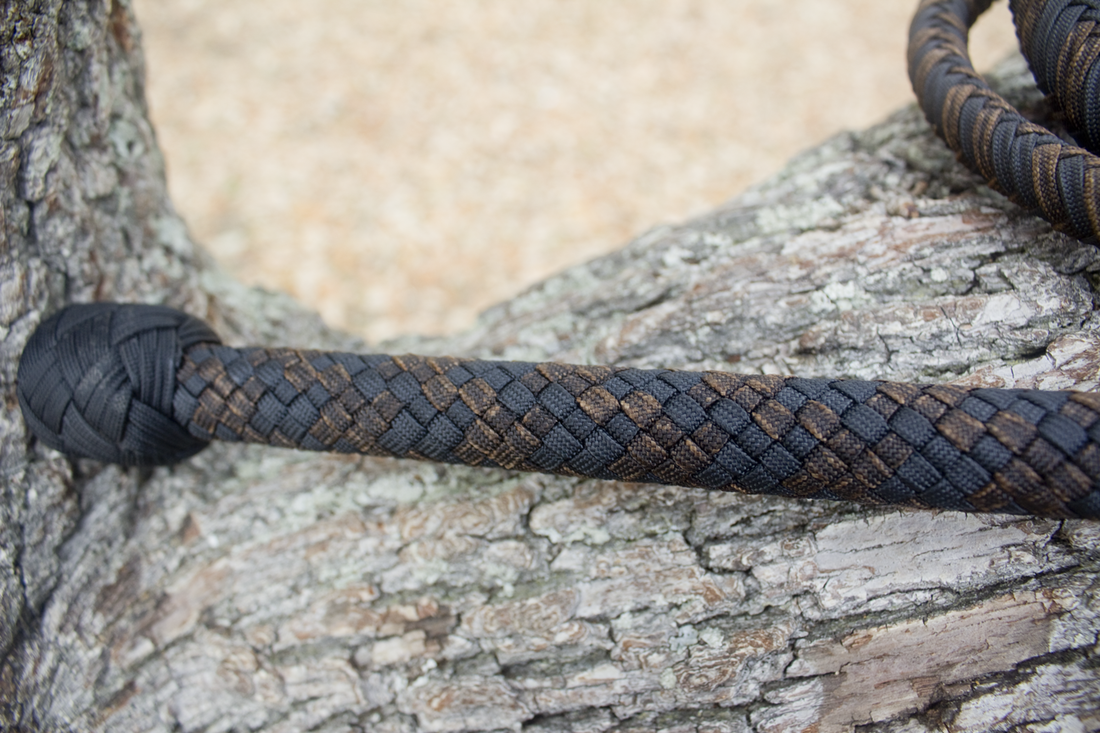
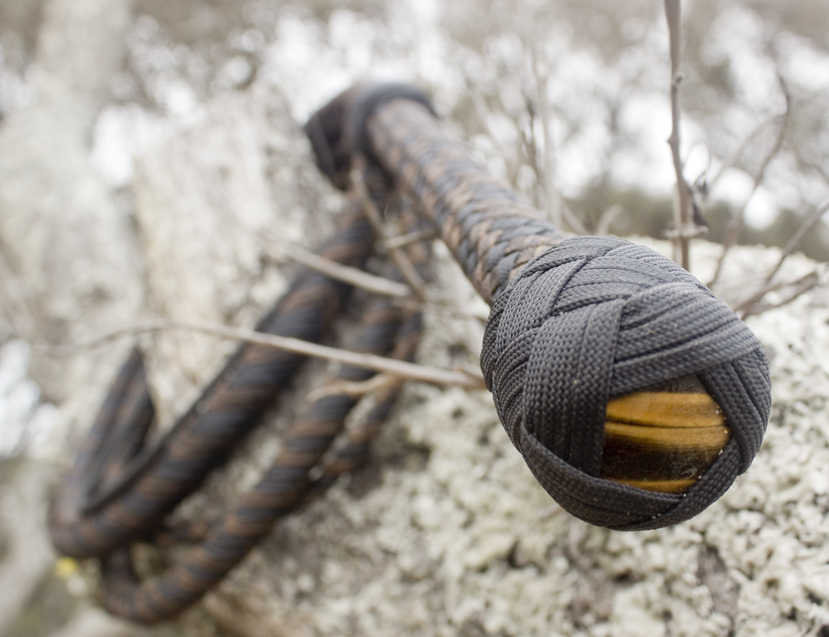
Welcome to this, the unfortunately delayed final entry in my 5-part series on the tools, mechanics and techniques in Whip Artistry! To summarize, Part One covered the construction and Anatomy of a fine Australian-style bullwhip. Part Two discussed the physics and principles involved in making a whip crack efficiently and effectively, (specifically Newton’s Laws of Motion concerning Conservation of Energy, Conservation of Momentum, and Inertia.) Part Three was a somewhat general overview of the “Circle Model” of whip practice and training that I have developed, drawing on the instruction, insight and inspiration from numerous teachers, fellow artists, artisans, and friends.

Parts Four and Five delve into two other training systems and approaches to Bullwhip Arts, and how the Circle Model discussed in Part 3 relates to and differs from them.

In the previous essay, I discussed Anthony DeLongis’s “Rolling Loop” method, and how it greatly deviates from the more traditional “Wild West” style of whip cracking.  I ended that essay  promising to discuss HOW and WHY the energy driving the whip comes from the hip in DeLongis Rolling Loop, and I will get to that. But first, I need to lay the groundwork for Ron Lew’s Tibetan Wave Filipino Martial Art system.

The form and technique of Tibetan Wave is a rather eclectic hybrid that combines concepts and forms from a number of very different martial arts styles and philosophies. A number of people have openly asked both Master Lew and me about exactly how a style he describes as Filipino that was developed by a Chinese American martial artist can be “Tibetan.”

The “official” answer is that soon after Master Lew began his exploration of applying Filipino Eskrima stick techniques to the bullwhip with Latigo y Daga founder, Guro Tom Meadows, he demonstrated the now trademark “Fishtail” back-and-forth motion that demonstrates the fluidity and dynamism that is the basis of Master Lew's unique style.
“I've never seen anything like that!” Guro Meadows told Master Lew, “What should we call that?”
​
“Tibetan Wave” was the impromptu answer from Master Lew, and the name not only came to be
applied to the undulating motion that Master Lew was demonstrating, but the entire style he now
teaches in seminars around the globe and in the training video I produced with him. That’s typically what his answer is when asked.

However, there is a more in-depth answer that Ron never shared directly with me or with anyone, but that I have managed to uncover indirectly and piece together over the nearly seven years that I've had the opportunity to communicate, train and collaborate with him.

This is something you learn in dealing with Ron. It’s rare that he will ever simply tell you anything outright. I think he was inspired to this practice by his teacher, the late Cacoy Cañete, (more on him in a bit).  Noy Cacoy often would be sparring with Ron, and would change up something he had taught Ron before. Ron would say, “Cacoy, you used to do this X way, but now you’re doing it Y...Why did you change it?” Cacoy would then smile and say “Oh! You Noticed!” and would then explain. Ron constantly says “If you want to know, just ask!” and he’s serious. He is an excellent teacher and instructor, and if you’re wanting deeper insights as to the why’s and where’s beyond the instruction, he’ll gladly tell you anything you want to know, but he doesn’t volunteer that information until you ask him about it directly. He wants you to discover those insights on your own, so they came from YOU rather than being TOLD. (FYI, this following information about WHY it’s REALLY called “Tibetan Wave” was pieced together and run by Ron...who confirmed that I was correct in WHY it’s called Tibetan Wave. Because “Oh! You noticed!”) 

Foundationally, Master Lew began to develop Tibetan Wave shortly after Guro Meadows began to develop Latigo y Daga. Latigo y Daga, is a slightly more widespread Filipino combat technique that is discussed in detail in Tom Meadows singular book, The Filipino Fighting Whip.
Guro Meadows technique has its origin in his years of training with Guro Dan Inosanto, applying
Filipino Olisi stick techniques to the bullwhip, and was greatly inspired and encouraged by fellow Inosanto student, Anthony DeLongis, (remember him from last episode?) The whip in Filipino martial tradition was often a longer, heavier, slower whip fashioned from rope. Latigo y Daga uses a shorter, lighter bullwhip crafted using fine Australian construction techniques that produce a fast, deadly accurate, and easily cracked whip. 

One of the key features of Latigo y Daga, and indeed the namesake of the form, (Spanish for “Whip and Knife”), pairs the whip with a bladed or rigid weapon in the off hand. Ideally the whip is used for long and medium range attacks and to keep the opponent at a distance, while the offhand would hold a stick or knife to attack and defend at medium and close ranges should the opponent get past the longer threat range of the whip.

Master Lew's Tibetan Wave technique follows many of the tenants of the Cacoy Doce Pares style of Eskrima he studied under legendary Filipino martial artist, Ciriaco "Cacoy" Cañete. Cacoy Doce Pares is generally a very aggressive, close range (corto mano) style where the practitioner - the Eskrimador - trains predominantly with a single stick, (rather than the double-stick techniques popularized in Balintawak and various forms of Arnis.) Cacoy believed that the opposable thumb on the off-hand was superior to any weapon one could carry, and holding a knife or stick in it was actually a disadvantage. Cacoy Doce Pares greatly demonstrates the fluidity of disarms and stick/opponent control that become possible when the Eskrimador doesn't look at their empty off-hand as a disadvantage in a fight.  

In this exchange from a Cacoy Doce Pares seminar lead by Ron and his long-time training partner and student, Grand Master Rommel Jimenez, (video courtesy of our good friend, Jhoanna Trias,) you can see how the off-hand is incorporated. That close distance between opponents - almost “dance partner” close - is typical of Cacoy’s style, and the speed at which they are moving in this video is greatly slowed for demonstration purposes.  I’ve seen them actually training at full-speed, and it’s blinding fast.  You can also see that Cacoy Doce Pares incorporates a great number of Jiu Jitsu style joint locks, and incorporates Judo-style throws, so Cacoy Doce Pares is already an eclectic hybrid system, drawing on martial arts techniques other than Filipino.

This brings us back to the development of Tibetan Wave. Much of Master Lew’s initial work with the Latigo y Daga bullwhip was a solo endeavor. Guro Meadows demonstrated the foundational principles and concepts, showed him a couple ways to crack the whip, (simple compound crack variations as discussed in the exploration of the “Circle Model” in Part Three ) and then left Master Lew to explore and practice on his own for a couple of months. 

Ron’s desire to apply Noy Cacoy’s empty off-hand techniques to bullwhip presented a conundrum. The whip is traditionally a medium-to-long range weapon, and if one is in range to strike with the whip, they are not readily in range to counter or block with the off-hand like they are in the extremely close range that Doce Pares favors. 

So, what to do with the off hand?

Here is where Master Lew's style makes a great departure from every other whip style I have ever encountered. Long before meeting Master Cacoy, Ron had studied directly under Sifu Paul Eng and was one of his first two students on the West Coast. Ron soon opened the Tiger Eye Claw school in San Jose, and spent almost two decades teaching Kung Fu and Tai Chi. 

In 1981, he attended a seminar by Professor Peng si Yu, a Qi Gong master from Shanghai, and was literally floored at what the then 80 year old man was able to do, (when I say “Literally Floored”, I am not speaking hyperbolically or metaphorically.) 

Master Lew then began his study of meditation and Qi Gong with Professor Yu. Yu spoke no English, and Ron spoke no Chinese, “But we both spoke energy,” Master Lew told me. That same year, while he was teaching Tai Chi and Kung Fu, and learning meditation, Qi Gong and energy work from Professor Yu, a student of his introduced him to Lopon le Hu, a Tibetan Monk living in the US, who began to share the Tibetan approach to energy with Ron. 

Master Lew found himself in a unique position to study these two very different approaches: Tibetan Energy Healing Techniques rooted heavily in Tibetan Buddhism and Bon Shamanism, and the Chinese Energy Techniques rooted in Zen Buddhism and Taoism. Master Lew soon found himself more drawn to the Tibetan approach to energy work, and began to apply those concepts to his Chinese Kung Fu, Tai Chi, and Qi Gong techniques, (for further example of this, see Master Lew’s Tibetan Tai Chi and Tibetan Qi Gong and Nei Gong training videos.)

As I have discussed in every post leading up to this one, the action of the whip is a physical manifestation of the flow of energy: Kinetic energy emanating from the dominant hand of the whip artist flows down the length of the whip, concentrating and accelerating to the point of the crack. The energy accelerates down the length of the whip, and as Newton’s laws of motion dictate, that flow of energy travels in a straight line, and I’ve spent about 17,000 words up until now explaining how that process works in this blog series.

In Tibetan Wave, the dominant hand sends energy down the length of the whip in a straight line as it does in every other bullwhip technique we’ve discussed up until now. Within Tibetan Wave, the off-hand is used to shape, redirect, focus, and stall the energy flowing down the length of the whip before the whip cracks. 

As was mentioned in Part 3’s discussion of the Circle Model, changing the direction or interrupting the flow of energy down the whip before the crack has occurred is typically inefficient and makes the whip behave unpredictably. 

For Ron, that unpredictable chaos is a whole new playground, dance floor, and battlefield to explore.

I have written quite a bit about the first time I saw Master Lew demonstrating Tibetan Wave. I discuss it in an article I wrote on Tibetan Wave for the upcoming flexible weapons edition of The Immersion Review magazine, I talk about it extensively in my section of the forward to Head Instructor at Tibetan Wave Germany, Michael Parchmann’s biography of Ron, “Life and Chi: It’s Easy Not Simple,” and I wrote about it here on this blog post back in 2015. I’d never seen anything like it. The whip was whirling around Ron like an electron cloud of an atom, seeming to pop loudly at odd intervals and odd angles to where it had popped just moments before. Ron was the nucleus of that atom, standing mostly still with his hands just moving about him in slow, circular,Tai-Chi motions.
The above video was shot in Germany around 2015 during one of the early Tibetan Wave seminars Ron held there and demonstrates some of what I’m talking about. Again, this was for demonstration purposes, and like his Eskrima work, It’s just a blur of motion and whip cracks at full speed.

This demonstrates where the off-hand comes into play, intercepting the flow of the whip and redirecting it. To apply the “Circle Model” to Tibetan Wave, you could say that in some techniques Ron is using in this video, the load phase of the crack is done with the dominant hand, and the throw phase is done with the off hand, and vice versa..They alternate, Ron explores a lot of previously uncharted ground here.  In many instances, the off-hand places the whip at the 180 degree point so that the dominant hand can throw the whip into the crack, in others it intercepts the whip during the 180-degree arc of the throw phase and moves the whip out of plane, shifting its energy and direction.  

It should be noted here that in Buddhist and Taoist philosophies and practices of Tai Chi, Qi Gong, and other types of Eastern “Energy Work” and Internal Martial Arts, the right hand, (typically the dominant hand,) sends out active, positive, dynamic Yang (Masculine,) energy and the Left hand sends out passive, negative, Yin (Feminine) energy.  “Masculine” and “Feminine” here are not in reference to gender, but in the interplay between opposite forces that combine to form all life, movement and flow in the world. This reflects deeply in Ron’s approach to Tibetan Wave, as Ron’s Yang-centered right hand tends to be the channel through which energy is imparted to the whip, while the Yin-centered left hand redirects, shifts, and shapes the flow of that energy.

The off-hand also does not grasp or yank on the whip, but intercepts, follows, and guides the thong of the whip as one does in Chinese Tuishou “Push Hands” Tai Chi techniques and the Chi Sau “Sticky Hands” methods in Wing Chun Kung Fu.

As a student of Tibetan Wave explores shifting direction, flow, and tempo of the whip with their off hand, they may also begin to explore where they draw the energy that they put into the whip with their dominant hand.  In most instances of Australian competition, Wild West performance, and martial arts done with a whip, the source of the power driving the whip tends to be generated by the shoulder and wrist of the whip performer.  

Go back and watch the previous video of Master Lew doing some free-form Tibetan Wave and watch the way his upper body rotates as he shifts his weight from one foot to the other.  That same type of shift in weight is what drives the whip forward in the “Basic Forward Throw” of DeLongis Rolling Loop. This is what I teased at the end of Part 4, but I wanted to discuss this here, as THIS is part and parcel to the common ground between Tibetan Wave and Rolling Loop.

As I said in the last couple paragraphs in Part Four, while the Basic Forward Throw in Rolling Loop doesn’t have what could be called a conventional “Load Phase”, it does have a very abbreviated one. In Rolling Loop training, the basic stance is that the feet are shoulder width apart, toes pointed directly forward and the foot on the off-hand side of the body is planted forward, but the shoulders are square to the target. It is very similar to a retracted stance in most Okinawan styles of Karatedo, though not as deep. 

That abbreviated “Load Phase” that allows the whip to stretch out somewhat so that the whip rolls FORWARD rather than UPWARD in the Rolling Loop Basic Throw, (as I mention in Part Four,) is the same power behind all punches and blocks in Karate.  It comes from a shift in weight from the back foot to the front foot...That causes the hip to rotate forward, and if the feet are pointed forward, the hip, spine, shoulder and arm all extend forward as well in perfect musculoskeletal alignment...That four to five inches of forward motion of the shoulder allows the whip to stretch out a bit behind the whip artist and the whip rolls out FORWARD, (not upward,) into a light but precise crack. As was also stated in part 4, the Compound and Elliptical throws in Rolling Loop are really just setups for the Basic Throw, so the whip in Rolling Loop is powered by the shift in weight and the forward rotation of the hip.

In Tibetan Wave, that power comes from a very similar hip rotation caused by a similar shift in weight between the whip artist’s feet. In Tai Chi, that weight shift causes the upper body to rotate, and that rotation changes the orientation of the lower dantien - the center of gravity and energy source and center of the body in Eastern Martial Arts, located approximately three inches below the navel - changing the direction that it points.  It is through that rotation of the dantien and shift in weight that all flow and movement in Tai Chi originates, and if you watch the video of Master Lew above, you will see that this is also where he’s drawing the power that’s driving the motion of the whip.

It’s a very subtle difference where one has to know what to look for, (just as one needs to know what to look for to see that the bulk of the energy imparted during the Load Phases of the Compound and Elliptical throws in Rolling Loop is sloughed off in the hesitation before the throw, and the primary drive forward is coming from the hip.)

As one continues to work, one can begin to explore how they power the whip: From the wrist, from the shoulder, from the hip, from pushing off with the back foot while both energizing and de-energizing the whip with the left hand and changing direction, flow, tempo and power.       

Working with Tibetan Wave becomes less an exercise in power, speed and accuracy as it is in most martial and Wild West Arts practices, and more an exploration of flow and rhythm. The power, speed and accuracy with the whip become secondary byproducts, just as in Kyudo, the Japanese Art of Zen Archery, hitting the bullseye becomes a secondary byproduct. In Kyudo, so the saying goes, the TRUE target is the self. 

The same for me holds true of the bullwhip in Tibetan Wave. Rather than the whip being a tool and a weapon for martial practice, it becomes a partner and a guide for external physical and internal meditative development.

Ron encourages exploring the motion and energy of the whip, always saying “Explore the in and out of the thong...The softness and the flexibility, and well as the power and the strike of the crack. The Yin and the Yang of its motion.

Something dawned on me about a decade ago while studying Shuri Ryu Karatedo with Sensei Charles Holbrook. We were learning a fundamental kata in the style, (Wunsu Kata,) and Sensei Holbrook was walking us through the steps. At one point, he demonstrated a move that trained for a particular defense/counterattack, but I noticed that that move actually happened BETWEEN the stances and steps we’d been taught. When one learned the proper stance and the proper technique to transition between them, the move just emerged.  

But it never really had to emerge from BETWEEN the stances. Katas and Tai Chi are not just stances and the transitions between them. Kata and Tai Chi are one big, continuous movement.  The stances are just fragments to break the complex down into to make it digestible and easier to learn.  

The same is true of The Circle Model, Rolling Loop, and Tibetan Wave. 

...When I teach the differentiation between a compound crack and an elliptical crack and talk about the “180 rule”...

...When Anthony teaches his process of the “Railroad Tracks” as a means to keep yourself and your partner safe and as a mechanic for hitting your target...

…When Ron teaches the different cracks and off-hand techniques for Tibetan Wave in his seminars across the planet and on the training video we produced together…

Those are just the Stances and the proper way to transition between them in the kata. 

Those are just the steps in the choreography, not the dance.

Anthony often calls those moments “Dancing on the Head of a Pin”: Where the dictates of the set and situation require you to just do the impossible with a long whip in close quarters to a fellow actor while surrounded with millions of dollars worth of equipment.
 
Ron calls it “Let Your Inner Child Come Out and Play.”

I call it “Meditation at Mach One.”

Back in the Introduction, I described working with a whip to being like an archeological dig: Just when you think you’ve uncovered it all, you find a little nub of something deeper...you start digging on that, and end up finding a whole new deeper foundation that the what you thought the base was built on.

No matter how far down the rabbit hole you go, there's always a deeper passage into an even more obscure nook of the warren.

If you’re reading this, you’ve probably already got a whip or are planning on getting one, so you’ve got the tool.  You've got your red pill, Neo. 

I’ve just given you a nearly 20,000 word map of my excavation to-date.

Find the edges.

Dig Deeper. 
0 Comments

The MACH ONE Model: A breakdown of Anthony DeLongis's Rolling Loop System, (Part 4 of 5)

4/12/2021

0 Comments

 
Picture
Surrounded by awesome. The author flanked by Anthony and Mary DeLongis after a LONG training session. Image courtesy of Bobbi HolyOak.
The next two essays in this series will outline the approach and mechanics of two seemingly very different bullwhip training and practice techniques, and how they fit/deviate from the Circle Model.

Because these techniques are not my own, I feel that I should clarify a number of things about these two essays. These are NOT “Which is better?” posts, nor are they critical of either of these systems.  I have studied them fairly extensively over the last 13 years, and within the last 6 years, I’ve had the opportunity to train directly under the martial artists who developed them.  It will be rather analytical in my discussion of both of them, but only to make clear the goals, purpose, and resulting design of each. 

Also, understand that the following posts are only my INTERPRETATION of the work of the respective developers. I do not speak for them, only for myself, (unless I give an actual quote, in which case I will denote that.)  I have spoken to both Anthony DeLongis and Ron Lew about this series, and they are supportive and interested in reading my analysis and interpretation, but they have had no direct input on them except where I have specified.

With that disclaimer in place, on to my discussion of DeLongis Rolling Loop!

First of all, let’s define exactly what DeLongis Rolling Loop was developed for and why. Anthony DeLongis is a weapons specialist, trainer, fightmaster, and performer of stunt work, dramatic violence, and stage combat. When he’s not performing himself, it’s his job to make other actors and performers appear to be skilled and confident combatants both in hand-to-hand and with any number of weapons, (I’m not going to go through the laundry list of different weapons, the projects he’s worked on, or the people he’s trained...If you’ve visited this website about bullwhips and are bothering to read this blog, chances are you know who the hell he is.  If you want to know more, just visit his website or check out his IMDB page of credits.) 

The goal of dramatic violence and stage combat is to create the illusion of chaotic, spontaneous danger and conflict in a safe, predictable, rehearsed and repeatable manner.

Anyone who has worked in theater knows that’s easier said than done. Things go wrong and actors miss their cues and forget their lines and blocking. That’s bad enough when that just happens with dialog, and the actors have to ad lib their way through the rough spot and either hope the audience doesn’t notice OR brings the audience along with them and make it part of the show...because failing to do so is figuratively “Dying” on stage.  When one puts weapons and action in the mix, those things that go wrong can cause actors to LITERALLY die on stage.

So, effective stage combat is about building as many safety factors into the training, choreography, rehearsal, and performance as one can. For armed “combat”, form and structure are used in such a way that the threat of injury with the weapon is kept as minimal as possible. The fight is choreographed so that every “attack” is prepared for, and the “defense” is there to intercept it.  The actual force behind blows is kept low and “fights” are structured in such a way that while it looks like the weapon is aimed at the opponent, it’s actually aimed at where the opponent's weapon should intercept and block it.

But things happen in live theater and when the cameras are rolling that cannot be anticipated. Mistakes happen. For this reason, weapons for dramatic violence are made as safe as they possibly can be.  For example, swords and bladed weapons have no sharp edges or points and are often crafted from aluminum to reduce their mass while still maintaining the appearance of heavy steel.  They are also often made of foam or rubber for film and television scenes where the clang of metal against metal can be added in editing.

I’ve stated ALL of that above to talk about how fightmasters for stage and screen build in multiple layers of safety for their performers. Using bullwhips for dramatic violence presents some daunting challenges to the performer, trainer, and fightmaster.  You can fake swords and still end up with passable staged violence.  It’s harder to fake a bullwhip.  If you swing a sword at someone, when you stop your arm, the blade stops. When you swing a bullwhip at someone, it keeps going and will either hit or wrap around them. There’s problem one. 

The factor that makes bullwhips so dangerous is that rapid acceleration to 800MPH. The tip of a whip travelling at that speed can slice through flesh, break small bones, and cause excruciating pain.  It does that through the structure and the physics involved that were discussed in Part One and Two of this series.  Unfortunately, removing those factors that make the bullwhip dangerous only make it marginally safer, (if at all,) because when you remove all of that acceleration and amplification of energy, you also remove consistency and predictability.  

Back in Part Two of this series, I stated that a well-made whip will behave consistently every time. The converse of that is also true: A poorly made whip, (one that exhibits little taper or structure,) will behave inconsistently. Over the years, I’ve seen people attempt to reduce the danger level of working with a whip by using lightweight, poorly made whips that don’t crack easily and even tying a streamer to the fall in the place of a popper on a well made whip so that drag from air friction slowed the tip down and  kept it from going supersonic. The trade off for both of those methods is that the whip becomes more difficult to work with, and behaves unpredictably because of those very same physics principles that make it work in the first place. 

There’s problem two: The things that produce the danger in working with whips are the EXACT same things that produce the safety. 

There are a number of safety factors that the experienced whip performer can build into his act to create the illusion of danger. I discussed this in Part Two in the section discussing the law of Conservation of Energy: Once the whip has transduced the kinetic energy of the wave into acoustic energy...making the loud bang of the crack...the whip is for the most part de energized, and the danger is greatly reduced. Hence the old trick of a whip performer throwing the whip and the tip obliterates a target held by their assistant with an explosive strike, then the whip performer seemingly does the exact same thing, the whip produces a loud explosion, but the last length of the whip that had just moments ago sliced dramatically through the target elegantly wraps around the assistant’s still outstretched hand.

That trick of placement has been used in entertainment since the days of the travelling Wild West Show, and made its way into the realm of the Hollywood Stuntman soon after. Douglas Fairbanks famously added the whip into Zorro mythos when he was looking for something new to impress audiences.  He felt as though he had explored all there was to explore in dramatic action with a sword in his films “The Mark of Zorro” (1920), “The Three Musketeers” (1921), and “The Thief of Bagdad” (1924).  He was searching for a new and dynamic weapon to really embody the flamboyant character he wanted to portray in his next Zorro film, and found it when he met Australian athlete and actor, Rex “Snowy” Baker who taught him how to use a fine Australian stockwhip.  

The action that resulted in Fairbanks’ 1925 film “Don Q, Son of Zorro” used these same illusions of danger with those same safety guidelines, and those same tricks of cutting targets from people’s hands, wrapping limbs, using angles and motion to make it look like the opponent was struck with the whip when they were safely outside of striking distance that had been used in those Wild West travelling shows since the late 19th century.

While special effects, photography methods, and editing technology of Hollywood became more refined, dramatic violence techniques for the whip remained relatively unchanged through the 1980’s. Not only was Indiana Jones an homage to those same Douglas Fairbanks films, and all of the westerns and Republic Pictures serials they inspired, but the techniques that Harrison Ford was using as Indiana Jones varied very little from the techniques that Douglas Fairbanks was using as Don Cesar de la Vega in “Don Q.”.    
One of the key things that Rolling Loop addresses is that it is a REPRESENTATIONAL type of performance rather than a PRESENTATIONAL type of performance.

Presentational performance is the style of performance in which there is no “Fourth Wall” and the performers are assumed to be aware of the audience and typically directly address and interact with them. Dance, magic acts, juggling, etc. are this type of performance.        

Representational performance is what people are used to in dramatic television and film, where there is a distinct “Fourth Wall.” The performers are portraying characters that are unaware and do not interact with the audience, (with few, usually comedic acceptions.)

The traditional conventions of whip cracking for entertainment were developed during the Wild West Show days of the 19th century. They were meant to be performed before a live audience in an interactive arena venue, where the whip had to be loud and flashy, there was typically room for the whip to stretch out, and the setup and performance for each trick was in a relatively controlled environment.

In this type of performance, using more force with the whip produces a louder crack, (often necessary for big arenas packed with lots of people,) and in the cases of travelling shows, the default way of dealing with odd terrain and a variety of obstacles was to put more force down the whip. If the whip is energized with more force behind it, then by the Law of Inertia it will take more outside force to move the whip off of its straight-line trajectory.

Typically, dramatic violence with a whip in movies and television is staged using photographic techniques so the whip is actually out of the danger range of the other performers or the action is expressed in the edit. 

The iconic opening scene in Raiders of the Lost Ark, (appearing in the link above,) is done in this way. We actually see very little of the whips motion: We begin with a close up of the bad guy with a look of determination on his face. We cut to a close up of his hip as he draws his revolver from a holster and cocks it.  We cut to a reverse angle close up of the back of Indiana’s head as he reacts to the sound of the gun being cocked. There’s then a rapid series of shots consisting of a Medium shot of the bad guy bringing the gun to bear on Indy, a close up of Indy’s hip as he turns to draw the whip, a wide shot of Indy continuing the action of his turn where he pulls the whip from his belt and swings it over his head, a close up of his his hand, whip held high over his head, back to the wide shot with him swinging it down toward the bad guy. Close up of the bad guy’s hand as he drops the gun with the sound of the whip crack, (you don’t even see the end of the whip come into frame,) back to the wide shot of Indy following through with the whip following the crack, and then cut back to the reverse angle where we see the bad guy clutching his hand in shocked pain and run away…

I point ALL of this out because we remember all of that as a smooth fluid action, but it’s all broken down into smaller elements that were shot separately to create the illusion of violence.  The whip actually never came anywhere near the actor playing the bad guy.

Other films and movies that feature whips use the exact same trick: Shot of the person cracking the whip, cut to reaction shot of the person who was hit with a slash in their clothing and a red streak of blood on their skin, cut back to a shot of the guy with the whip.  The whip fights between Burt Lancaster and Walter Matthau in "The Kentuckian", the training scenes between Anthony Hopkins and Antonio Banderas in the “The Mask of Zorro”, just about all the action scenes from Lash LaRue and Whip Wilson’s serial westerns...they ALL follow this method. The list goes on and on.

This is where Anthony and the Rolling Loop technique come into the picture. So, let’s just take a short look at Rolling Loop in action for comparison. This is a different video than the Black Belt Magazine video we looked at in Part Three.
This is actually an older video...It was uploaded in 2007, so the compression is high and the quality isn’t that great, but the action is superb.  If you look at the footage of the takedown from about 2:55, and running until almost the 3 minute mark, (as well as the action from "The Rundown" earlier with the neck wraps on Dwayne Johnson performed by Anthony’s whip student Stuart Wilson,) you’ll see a very different type of action to the traditional forms above. This has a more visceral “Hong Kong” style of flow that requires a very different approach and a very different set of safety parameters to keep performers safe.  Something else about that video...The video of Anthony doing the single whip demonstration, the double whip scene from a movie where he’s snuffing candles, and the 2:55 wrap and take down of his opponent - all of that footage was shot about 1993 or 1994. As someone who has worked with the man, I can tell you that Rolling Loop is far more refined, subtle, and effective now than it was even then.

I’ll let Anthony give the short version of this, in this interview from Wasteland Weekend.
So that’s the Elevator pitch, but it really doesn’t do much to address exactly how Rolling Loop overcomes many of the complications that whips present in presenting this type of dramatic violence.  The general consensus typically is that DeLongis Rolling Loop is mechanically just the traditional Wild West style, but the whip flipped over so it’s held supinated rather than pronated, (see Part 3 for my discussion of how that works,) and that is indeed part of it, but it runs far FAR deeper than that and is far more subtle, more effective, and more innovative.

Let me preface all of this by making the following analogy: Learning to crack a whip is like riding a bicycle, and honestly the physics are very similar because it's ALL about Inertia and Angular Momentum.

When you are learning to ride a bicycle, the first thing you learn is FORWARD. Turning and stopping are pretty problematic at first, but FORWARD you can learn pretty quickly. Additionally, that forward can look pretty smooth and even as long as you keep pedaling. As long as you're continually putting energy into the system, you can keep moving forward.

The minute you stop pedaling, that’s when steering and balance get wonky, that’s the Law of Inertia I was talking about in Part 2. The bike continues in a straight line as long as the energy you’re pushing into it through the pedals is greater than the outside forces acting against it. Those outside forces here are your lack of balance and all the fighting you do with the handlebars at first, (I distinctly remember facing this as a kid learning to ride a bike, all wobbly and zig-zag at first...then get up to the point that I’m in a clear line of sight of the window of the neighbor girl I liked...then pedal like hell to look all smooth and cool as I passed on by the window...and the moment I’m out of sight, back to all wobbly and zig-zagged as I’m breathing hard and rubber-legged with exhaustion for how hard I was peddling.)

Once you get FORWARD smoothly, then you can progress to turning, learn balance so you don’t even have to pedal to stay upright, and if you really spend a lot of time and effort, you can balance on front wheels, back wheels, and can really begin to explore.  But it takes a LONG time to get there.

We typically do the same thing with learning whip cracking. We work too hard, we fight against ourselves, and we gain accuracy and can keep the whip straight by putting more energy into the process than is needed, and any balance minimal effort, and fluidity we develop comes out of putting in the time and sweat equity.       

So, as we’ve said, we can’t particularly fake a whip like we can with a rubber or foam sword, and an inexperienced performer using a bullwhip on a movie set is about as dangerous as trying to get a performer who has never ridden a motorcyle to hit their mark with it on cue without a spill that damages the bike, the set, and the cast and crew.

Hence the development of DeLongis Rolling Loop and the training method involved.

Learning DeLongis Rolling Loop isn’t like learning to ride a bike so much as it’s like learning to ride a unicycle. You don’t get to go forward until you can keep your balance, learn your structure and can send the whip out with pinpoint accuracy with almost no force behind it at all.

That sounds just about as daunting as it is. For me, DeLongis Rolling Loop had a learning curve that sloped like Mt. Everest. By the time I first worked with Anthony in-person, I had already been working extensively with a bullwhip for over 13 years...As I’ve said quite often, I’ve been lucky enough to learn from some of the most skilled whip performers in North America. I’d been offering training through MACH ONE for two years, and had done some training with Ron Lew in the Tibetan Wave technique we will discuss in-depth in next week’s entry. 

Even with ALL OF that, I still struggled with some of what I could see were the core principles of Rolling Loop. I feel some of that was that ALL of that previous experience had to be left at the door to the training space. To use an old Zen saying, I had to “Empty My Cup” before I could fill it with something new, and that’s easier said than done.

Anthony’s Rolling Loop system adds a third crack to what I would call the “Ideal Cracks,” (I discussed the two “Ideal Cracks” in the MACH ONE “Circle Model” in the Part Three.) In addition to the “Compound,” (also called “Compound” in Rolling Loop because I stole the term from Anthony,) and “Elliptical” (what Anthony calls “the Windmill” in his training videos and sessions,) of the Circle Model, Rolling Loop adds what Anthony calls a “Basic Forward Throw.” 

This, like the others can be performed forehand and backhand and at all angles, (the “Circle Model” once again, borrows heavily from Rolling Loop in this regard. As I mention in Part One, one of the things that I admired about Rolling Loop is that it creates a simplified system for talking about cracking techniques, eliminating all the oddball names like “Fargo Flash” and “Tasmanian Cutback” which are cool and all, but really tell you nothing about how the whip is cracking, in what plane, and on what side of the body.) 

HOWEVER, The “Basic Forward” throw is not included in the MACH ONE system at all because it does not follow the 180-Degree Rule, that is essentially the foundation of the circle model.
As the slate at the beginning of the above video states, it was shot during Anthony’s Bullwhip Master Class at Combat Con in 2019 by our friend, the lovely Ramona Falkowitz.  There’s very little footage anywhere of Anthony performing JUST this basic crack. It is not particularly loud or flashy, and while Anthony uses it “behind the scenes” quite often as a method to keep himself, the “Target” talent down range, and the camera person who is set up very close to Anthony to get the shot, he doesn’t often OVERTLY use it directly in demonstrations.  But it is a skill like "Finding Middle C" on a piano.  You have to know that before you can play Chopin.

Both Ramona and Anthony have agreed to let me use this footage here as a demonstration to what I am describing, (and as an aside, I have a correction to make. Anthony is discussing the whip gaining momentum and retaining energy, and states that the principles of the Conservation of Momentum is Newton’s Second Law.  Actually, it’s Newton’s Third Law...and Anthony is only incorrect because he was agreeing with some idiot just out of frame. That idiot is me. So, my apologies. I digress.)   

As you can see, the Basic Forward Throw essentially has no Load Phase. The whip doesn’t stretch out in the opposite direction of the crack as I spoke about with the Circle Model, and therefore, there is very little energy loaded INTO the whip as it rolls forward.  The whip still breaks the sound barrier, but does not really begin to accelerate to speeds that could cause any serious ballistic damage to something or someone within the threat range until much further along the path to the crack. This is in part due to the supinated orientation of the whip, (described in Part One) and partially due to the lower power.  

But what about those other two cracks in Rolling Loop: the Compound and the Windmill?  Well, the way that Anthony often describes it, he has ADDED the Basic Forward Throw to the traditional methods, (the Compound and the Elliptical in the Circle Model,) but it is my opinion that Rolling Loop doesn’t have three cracks, it only has one.

As I pointed out in Part 3 of this series, within the Circle Model, a whip travels through a 360-degree arc where 180-degrees consists of a “Load Phase” and 180-degrees of a “Throw Phase” into the crack.

Review the video that I shared of Master Lew demonstrating the vertical compound crack in Part 3, and notice how far back the whip stretches before Ron begins his forward movement.
Now, watch Anthony perform what mechanically APPEARS to be the same vertical compound crack toward the beginning of this video, and look at where the thong is stretched out when he begins his forward movement.  
In Master Lew’s Vertical Compound above, the whip is stretched out about 180-degrees from where he wants the whip to crack, so it’s almost stretched out parallel to the ground when he begins his forward movement. 

In Anthony’s Rolling Loop, there is a delay where the whip has almost curled all the way back down to the ground before he begins the forward movement. 

This has two major effects. 

The first is that the supinated whip forms the loop directly in front of the handle rather than forming further down the whip as we see in Wild West style, The Circle Model and Tibetan Wave, (this is a key characteristic of Anthony’s Rolling Loop system that makes it FAR more visually appealing in cinema.) 

The second is that while the whip remains in motion and is still somewhat energized, it has “dumped” a significant amount of the energy payload that was loaded into it as Anthony swung the whip over his shoulder in the "Load Phase" of that compound crack.

Think of it like this: Imagine you’re holding a bottle of water with no cap on it, and you want to sling water at something ahead of you. If you swing it over your shoulder and immediately swing it forward, the bulk of that water will spray out forward.  However, if you hesitate between the “Load” phase swinging it backward and the “Throw” phase of swinging it forward, more water just spills out behind you, and not as much of the water makes it out in front of you.

The same thing is happening here with the whip.  

If you watch Anthony performing both compound and windmill cracks, that hesitation really turns that “Compound Crack” and “Windmill” crack into a relatively de-energized “Basic Forward.”  The dramatic swing backward and behind in the Compound and Elliptical MOVEMENTS are really not much more than setting up the Basic Forward.

Now, here’s where it all goes sideways…

IF what I’ve stated is valid, and IF DeLongis Rolling Loop reduces the Compound and Elliptical cracks in my Circle Model to just setting up the Basic Forward. AND the Basic Forward doesn’t exist in the Circle Model because it essentially does not follow the 180-degree rule, THEN didn’t I just COMPLETELY invalidate that Circle Model that I spent almost 5000 words describing in tedious detail in Part 3?

I struggled with that thought for a long while after it finally dawned on me how Rolling Loop worked, (and I specifically used a video that Ramona shot of Anthony’s Master Class to demonstrate the Basic Forward Throw in this post because it was one of her videos from that class that featured Anthony working directly WITH me that FINALLY showed me that Anthony’s Compound didn’t follow my 180-degree rule either because it was just a setup for the Basic Forward.  So, it was thanks to her for that I experienced that big “AH HA” moment!  Thank you for providing that glorious revelation and existential crisis, Ramona!)  

As I stated in the Introduction to this series of essays, the purpose of sharing all of this granular tedium on whip cracking and asking for feedback is to improve the Circle Model.  Improving it often involves breaking it first.  I myself had dashed it upon the rocks a couple times before and completely reimagined it.

I thought I might have to do that yet again, but that’s not really the case. The key difference between the Circle Model and Rolling Loop is a difference in goals.  

One of the goals in the Circle Model is to maximize the output with minimal input.  That’s what the 180-degree rule is all about.  If the motion of the whip can be considered an orbit, then the turning point at that 180-degrees from the crack is the apogee.  It is at that point that you’re no longer loading energy into the whip, and if the whip travels past that point, then it starts losing energy. Within the Circle Model, that is where the turn should take place, as that is the optimum point to turn the direction and deliver the maximum payload to the target.

The goals of Rolling Loop are the exact opposite of that.  Rolling Loop was developed for stage combat and dramatic violence.  The goal is to deliver a minimum payload of energy to the target for the safety of the performer while maintaining the appearance that the whip is moving under significant force.   

That additional layer of safety protocol, just DID NOT exist in Hollywood whip work before Anthony.

That additional safety protocol is SO convincing that people who’ve been using whips for years, (like me,) don’t often see it, and it’s something that even seasoned stage combat folks don’t always get.

And that leaves us with two more questions that I want to touch on in this entry: 

First, if Rolling Loop was developed by a martial artist for stage combat and simulated violence, then does that mean that Rolling Loop is lacking in actual practical ballistic use in actual martial practice?

Not at all.  In fact, it trains a level of skill that if need be would prove just as - if not far more effective than - the more ballistic Wild West approach that the Circle Model was initially based on.

I said earlier that Anthony “dumps” a lot of that energy in the hesitation between the load and the throw phase, but the truth is, he doesn’t have to if he chooses not to.  And that’s the key thing here: Choice in how he wants to apply it. He can put as much pressure and power down that whip as he wants to, and can back off of the power while maintaining the same accuracy and precision. That subtlety is astounding.

Since my last training session with Anthony, (and the revelation of what he was doing vs. what I was doing,) I have worked diligently on that Basic Forward Throw to make it as smooth and flowing as I can, and the dynamic range of power in my throws has increased greatly.  I have extended the lower range. 

On a scale of 1-10 where 1 is the lightest I can throw a whip with accuracy and 10 is full-on loudest/hardest I can go, what was my Level 1 before is now between a 3 and a 4. 

As with everything with the whip, once you’ve got doing it lightly, it’s just as easy to add more force behind it.  So, not only can I work much more lightly than I ever could before, I now can hit harder and faster with that much more accuracy while using even less effort. 

The last question is this: Even though the Basic Forward Throw doesn’t follow the Circle Model’s 180-degree rule, the laws of physics still apply.  Since the whip begins de-energized, essentially stretched out toward the ground, then when you push the whip forward into the Throw Phase, why doesn’t it end up going straight up - 180-degrees from the at-rest state it was in when it was stretched out toward the ground?  

This has to do with the very short “Load” phase, and where the energy that is actually loaded into the whip comes from.

In the Circle Model, that energy comes from the arm through the mechanical act of raising the whip and stretching it out.

In DeLongis Rolling Loop, that energy comes from the hip on the dominant side of the body...

AAAAAND that is a perfect segue and teaser for the next entry, because I will explain all of this covering Ron Lew’s Tibetan Wave...So, there’s my tease for the NEXT chapter.  Excelsior, and tune in next week, true believers!  

I see you shiver with antici…   
0 Comments

The MACH ONE Model: The Foundations of the Circle Model (Part 3 of 5)

3/30/2021

0 Comments

 
Now that we have covered the design of the whip and the physics under which it operates, we can get into the real meat of whip artistry. The following is a simplified outline of the Mach One “Circle Model” that I have been developing for the last 15 years. 

I have found that the Circle Model applies to every type of whip artistry style that I have encountered; martial arts, stunt work/dramatic violence, Wild West shows, Fetish/BDSM, dance/performance art, and competitive two-handed Australian style whip cracking. It also works incredibly well as a jumping-off point for any and all of these different styles, as I will cover in Part Four in an explanation of Anthony DeLongis’s “Rolling Loop” method of bullwhip artistry, and in Part five’s discussion of Ron Lew’s “Tibetan Wave” bullwhip martial art form. 

But, the model is not perfect, and nor do I consider it to be all-inclusive. The Mach One “Circle” model is just that - a model. It presents a simplified set of rules to achieve the theoretical "Ideal Crack”. The “Ideal Crack” does not exist, and may or may not be something that you even aspire to, (I certainly don’t, and as I’m the guy who defined it, you shouldn’t either.) It is really just a means to rapidly learn how to crack a whip smoothly and effortlessly in all angles, alignments, and directions, and a “checklist” of potential questions to ask yourself if you’re having problems with a particular trick, routine, or crack. The “Rules” are there as a guideline to rapidly build skill and keep the new student from hitting themselves. Once you have learned the rules, you can easily break them, (and I will outline several instances of how and why later in this essay, and in the next as well.)

So, that said let me give the basic tenants of the Mach One “Circle” Model and define the characteristics of an ideal crack:
  • The Ideal Crack uses a minimum amount of effort to deliver the maximum payload of energy to the target.
  • The Ideal Crack can be described in simple terms as the length of the whip traveling in an arcing movement of 360-degrees within a 2-dimensional plane. 
  • The 360-degrees of the crack can be divided into two 180-degree phases; The “Load Phase” and the “Throw Phase”.
  • The “Load Phase” is the first half of the crack in which kinetic energy is imparted to the whip through the arm of the whip artist and the thong begins to stretch out. Energy is loaded into the whip in the opposite direction that the whip will crack. 
  • The “Throw Phase” is the second half of the crack in which the wave of kinetic energy imparted to the whip during the load phase begins to roll down the length of the whip in the exact opposite direction that the energy was “loaded” in. This wave increases in speed through the principles discussed in Part Two of this essay series until the tip of the whip accelerates past the sound barrier, and the kinetic energy is transduced into the acoustic energy of the crack.
  • There are two types of Ideal Crack, and all typical whip cracks, tricks, and routines are composed of these two cracks in different directions, angles, planes, and combinations. These two types of Ideal Crack are the Compound Crack and the Elliptical Crack.
  • The Compound Crack is so called because one performs a back and forth compound motion with their arm to generate the crack, similar to throwing a dart, hammering in a nail, or chopping wood. The whip moves the 180-degrees of the Load Phase, then reverses direction and follows the SAME PATH for the Throw Phase into the crack, like a windshield wiper traces its path back and forth in an oscillating pattern. The Wild West Arts “Circus Crack” and “Cattleman’s Crack” are this type of crack.
  • The Elliptical Crack forms a full loop in a 360-degree path, but for the whip to extend into the crack, it moves in more of an elongated elliptical or egg shape. This type of movement with a baton or eskrima in Filipino Martial Arts is referred to as a Redondo, and in Historic European swordplay, this is typically referred to as a moulinette. The optimum way to perform this crack is to allow the whip to move in an arc from the floor, and when it is stretched out, the arm somewhat pushes the whip forward, where it rolls out in a “U” shape into the crack. The Wild West Arts “Overhand Flick” and “Sidearm Crack” are this type of crack. 

This description is a little confusing, but let me try to explain it this way. The potential reach, arc, and movement of the whip, at its most rudimentary, can be visualized as circular, (hence the name of the model.) The radius of the circle is defined by the length of the whip plus the length of the artist’s arm up to his shoulder where the shoulder is the origin point of the circle.

I often advise beginners to whip cracking to make sure they have a clear amount of workspace, and to define their boundaries by standing in place and making a full 360- degree turn on their heels, allowing the whip to stretch out and draw a circle like one would with a compass, and also swing the whip in a vertical arc to make sure they have clear space overhead to work. If the whip doesn’t snag, drag, or strike anything in that process, then you are probably safe to crack the whip there.
 
To illustrate this, let me apply the “Circle Model” to the vertical compound crack, the basic “Circus Crack” that is usually the very first thing that every new whip cracker learns. In this crack, the whip is lifted in a straight line by the dominant arm, and travels in an arc overhead to stretch out behind the whip artist. Then, the whip artist lowers his arm, extending it forward, (in a “Compound motion like lifting and dropping an ax or a hammer as though chopping wood or driving in a nail.) The whip, seemingly trying to catch up to the hand, forms a circular loop behind the handle, and that loop rolls down the whip in a wave of energy until the whip cracks.

Below is a very short slow-motion section of video of my friend and mentor, Senior Grand Master Ron Lew demonstrating this crack. This video is taken from the first lesson on the “Tibetan Wave: The Filipino Fighting Whip” training video that Master Lew and I produced together in 2019.
As can be seen in this video, the whip moves through two 180-degree phases. In the Load Phase, Master Lew raises the whip, and it stretches out, swinging in an arc behind his back. Note that the whip travels slightly past the point that it would be stretched out DIRECTLY behind him and run parallel to the ground. At that point, Master Lew begins to straighten his arm like he’s throwing a dart. The loop forms in the thong and rolls out into the crack. 

Note that the whip cracks while the whip is still angled slightly upward and at the point of the crack the whip is not yet parallel to the ground. If you draw a straight line between the tip of the whip at the point in time where the whip has straightened out and Master Lew’s shoulder, you can continue that line on past the shoulder, and it will show you roughly where the whip had straightened out behind him and the tip of the whip just intersects the line at the point that he begins to move the whip forward into the Throw phase of the crack.

With both of these types of crack, the whip stretches out and begins the Throw Phase when the tip of the whip is 180-degrees from where we desire the whip to crack. So, if one wants the whip to crack directly in front of them, the whip has to stretch out directly behind them before they move the whip forward. Likewise, if one wants to crack the whip toward the right, the whip has to first stretch out toward the left. 

When I teach whip-cracking, I encourage students to always visualize a target in front of them that they want the whip to extend toward.  Even if it’s not an actual target that you are trying to hit, visualize something near shoulder height.  If you have a problem with this, find something out of range for the whip to “aim at” like a mark on a wall, a knot on a tree, etc, JUST to get into the practice of putting the tip of the whip where you want it.     


Picture
The "Load" phase complete
Picture
The "Throw" phase complete, (at the crack)
As a corollary to this, I also ask new students to try to get the whip to crack directly in front of them so that when it is at full extension, the whip is parallel to the ground. I use this “180-Degree Rule” as a means to fine-tune and troubleshoot this process. If the whip is cracking higher than shoulder level, then the 180-degree point, (where the “Load” phase transitions to the “Throw” phase,) is lower than shoulder level, so the whip cracker is hesitating too long before beginning the Throw Phase. If the whip cracks below shoulder level or is being driven into the ground, then the whip cracker is not letting the whip stretch out far enough behind them, and they need to wait slightly longer. Once the whip student has learned this, they can easily place the crack at any height or angle that they wish. I use this same method in trouble-shooting my own work.

I have covered the part of the description of the Ideal Crack as a 360-degree arc, but I haven’t touched on it traveling in what you could call a 2-dimensional plane. To demonstrate what I’m talking about, watch the following video.
This is a slow-motion video of Master Lew performing the exact same crack as before, but now we are looking at it from the front. So, you’re seeing the compound crack moving through its 180-degree Load and 180-degree Throw phases, and you can see from this angle that the whip travels in a relatively straight line through its entire motion. A lot of new whip crackers struggle to keep the whip IN that straight line, but in truth that struggle typically does nothing but pull the whip OUT of the straight line. As I discussed in Part One of this series in the section about inertia, by the very nature of the physics involved, the whip will travel in a straight line. When the whip has been energized, it takes a good amount of “external force” to shift its path. When the whip is moving, gravity can’t overcome the inertia, and performing this same crack in an overhead horizontal plane is no different from performing it in a vertical plane. 

In fact, both elliptical and compound cracks can be performed at almost every angle on both the dominant, non-dominant sides of the body as well as overhead and in a front plane. Once the whip artist learns how to work with these angles smoothly and evenly, then one can begin to perform complex combos, volleys, and routines.

Anthony DeLongis demonstrates this in the first couple minutes of this video from Black Belt Magazine, demonstrating it as the 8 major angles of attack from the Inosanto martial arts system, but you can easily subdivide those angles into more specific angles. Ron Lew’s Tibetan Wave system presents this as a clock face where the vertical descending compound crack is 12-o’clock. 2 o’clock and 11 o’clock would be a descending diagonal on either side of the body, 3 o’clock and 9 o’clock would be horizontal “sidearm” cracks to either side of the body, etc. 
I often do a practice drill related to this where I change up the exercise of angle exploration that Anthony demonstrates, (which mirrors a Filipino stick drill, and also a European saber and longsword cutting drill,) and just go as far around the circle as I smoothly as I can with elliptical cracks: starting vertical with 12 o’clock, then to forehand descending diagonals at 1 and 2 o’clock...horizontal forehand at 3 o’clock...forehand ascending diagonals at 4 and 5 o’clock, and vertical ascending “underhand flick” at 6 o’clock, and then back up the opposite side of the clock face using the backhand swing across my body for 7 to 11 o’clock. 

One of the biggest challenges to exploring all these directions and angles is safety. When one is learning to crack a whip, they will invariably end up hitting themselves. Minimizing the risk by long pants and eye protection is a great way to start, and I recommend wearing eye protection when practicing or when working on a new trick or technique even for seasoned whip performers, because you may end up with a welt or even a cool “Indiana Jones” scar on your skin from a mishap. Those heal. Losing an eye is something else entirely.

I have seen some teachers even recommend wearing a leather jacket and a motorcycle helmet when learning. This is ludicrous and completely unnecessary. All this teaches students is to be afraid of the whip. In my experience, both with students and in learning myself, it is that fear of hitting yourself that invariably causes you to hit yourself. Once one hits themselves, they try to get out of the whips way, often bending themselves out of proper musculoskeletal alignment, and as we have mentioned, that misalignment is mirrored and amplified by the whip. That misalignment makes the whip behave unpredictably, increasing the possibility of hitting yourself. Also when you anticipate being hit, you involuntarily tense up or even flinch. That tension, once again, is reflected and amplified by the whip. So, in trying not to hit yourself, you increase the odds of hitting yourself in an ever-intensifying and frustrating feedback loop. 

The trick to keeping yourself safe is keeping yourself outside of that cracking plane. The DeLongis Rolling Loop method addresses this in a number of ways, (which will be discussed in the next section,) but the primary safety factor is the “railroad tracks” analogy. Anthony’s “railroad tracks” operate under the same principles as the flat planes of the circle model. In Rolling Loop, you learn to keep anything you don’t want the whip to hit, inside and outside of the line of the railroad track, (including yourself.) Anything you want to strike or wrap, you put on the railroad track. This holds true for all planes and all angles. If you are doing a Compound type of crack in any plane, and you don’t hit yourself in the Load Phase of the crack, but then you DO hit yourself in the Throw Phase, you have pulled the whip out of alignment somewhere.

That brings us to the next major aspect of exploring all of those planes and angles. Along the way, one will invariably want to begin building combinations of multiple cracks flowing into one another. This is the foundation of two-handed cracking routines, as well as single whip drills. Most of the difficulties I see with people learning combinations is that they are rushing into the next move before completing the one the whip is still in the process of performing. 

As I discussed in Part Two, the Law of Inertia states that an object in motion will continue that motion IN A STRAIGHT LINE unless acted upon by some outside force. While the whip is rolling into the crack, it continues to accelerate. Any outside force will naturally decelerate the velocity of the whip, just like a car will slow down around a curve. This is why race car drivers have to “accelerate” into curves; they need to apply more energy to maintain the speed they were keeping on the straightaway of the track. Trying to change any plane or any angle before the whip has cracked, and is naturally decelerated due to transduction of the kinetic energy to sound and shock drag, will result in rapid deceleration and unpredictable behavior. Therefore if one does this, then the attempted multiple-crack routine will fall apart, and the whip cracker will invariably hit themselves with the whip. 

This is one of many characteristics that makes the whip an incredible training tool for other weapons. In cutting drills with knives and swords in both Eastern and Western martial arts, “Breaking your structure” or rolling your wrist, (and therefore the edge of the blade,) during a cut is typically bad form and can lead to problems. 

In both traditional Japanese Martial Arts that train in Tamishigiri, and in modern Historical European Martial Arts training, cutting tightly rolled tatami mats is a way of evaluating proper technique in maintaining cutting angles through the cut. 

The whip trains the same process through each crack, as if one rolls their wrist or deviates from that precise plane the artist began the movement in BEFORE the whip has completed it’s motion and cracked, then the whip will not crack efficiently and move predictably.

If one looks at the angles that Anthony DeLongis is demonstrating in the video posted above, you can see that every angle and plane that Anthony transitions to is performed AFTER the whip has cracked. He uses that audio and tactile feedback from the whip as his cue to change direction and flow into the load phase of the next crack in the sequence. He doesn’t break/adjust his angle or structure until the whip has completed its motion, and is just following through.

That is not to say that changing the plane of the whip between the load and throw phase doesn’t have its purposes.  There is a great routine by my old friend Chris “The Whip Guy” Camp where he cuts a target out of the mouth of someone facing away from him, literally making the whip snake out away from him before “turning a corner” and cutting the target.  I was blown away when I first saw it, and it took a number of times seeing him perform the trick to figure out how he did it, (once or twice during performances when I stood in as his assistant and held the target he cut in my teeth.)  Without giving the secret away, I can tell you that it’s done through a very controlled and rehearsed violation of the “180-degree rule” in the Circle Model.

Ron Lew’s Tibetan Wave bullwhip technique also operates outside the Circle Model by using the off-hand to change the flow and trajectory of an already energized and in-motion bullwhip, which I will discuss in greater detail in Part Five of this series. 

One final thing I want to touch on that I will expand a bit on in my discussion of Rolling Loop and Tibetan Wave in Parts Four and Five is alignment. In Part One’s discussion of the construction and anatomy of a well-made bullwhip, I explained that a whip has a dorsal side and a ventral side, and can be held in either a pronated or supinated orientation when cracking. That orientation should definitionally apply only to the vertical cracking plane that is a right angle to the ground, but we’re going to expand that discussion of orientation to all the angles we’ve discussed. Once the whip is in motion, the angle of the whip makes no difference in the mechanics of the crack, so what holds true for the vertical plane holds equally true for the horizontal and diagonal planes on both sides of the body.

Think of it this way. I mentioned in Part One that a whip has a “Spine” structure like a human being, and it bends more comfortably toward its ventral axis than its dorsal axis, (like we can bend over easier than we can bend backward, as I discussed in curling fingers toward the palm vs. bending them backward.) We CAN look at whips as having a spine, and like all vertebrate creatures, it is bilaterally symmetrical, meaning one side of the spinal column is a mirror image of the other, just like our structure...Two arms, two legs, two eyes, ears, and nostrils, etc. The whip structure is obviously not as complicated as that, but it is nonetheless symmetrical. That line of symmetry runs right along the center of the dorsal surface, and the 2-dimensional plane that the whip is cracking in bisects the whip along its line of symmetry.

To put this more simply, In both Tibetan Wave and Rolling Loop the flow and motion of the whip angles is analogous to a knife or sword blade, and just like the angle and orientation of the cutting edge of the blade should be aligned to the angle and orientation the blade is cutting in, so too should the dorsal or ventral axis of the whip be aligned to that plane and angle of motion. After all, there is little use to striking your opponent or target with the flat of the blade. Think of those dorsal and ventral bisecting lines of the whip to be the true edge and false edge of a sword. 

Also, please note that when I refer to pronation and supination, I am referring ONLY to the orientation of the whip, not the orientation of the hand holding it. The body mechanics utilized are identical regardless if the whip itself is pronated or supinated. The only time we really switch our hand from a pronated to a supinated orientation, (regardless if the whip is pronated or supinated,) is in cracking the whip on the non-dominant hand side of the body, (i.e. working in planes on the opposite side of the body as the hand holding the whip). Anthony demonstrates this in the above video with the horizontal plane and diagonal descending and ascending he does where he performs them with the whip on the left side of his body. Rolling Loop uses the terms forehead and backhand for this, and just like in tennis, the forehand cracks occur on the dominant side of the body with the hand in a pronated orientation, and the backhand cracks occur on the non-dominant side of the body with the hand in supinated orientation.

I mentioned back in Part One that one of the major points of divergence between DeLongis Rolling Loop and Ron Lew’s Tibetan Wave system is that each one solely utilized a single orientation, (Rolling Loop the supinated “curve up” orientation, and Tibetan Wave the pronated “curve down”.) I personally use and teach both, and have for about 15 years now, and am at a point that I transition smoothly between a pronated grip and a supinated grip between cracks as easily as I change angles and planes. In fact, I do a whip drill similar to the “Round the clock” exercise I mentioned earlier where I work through all the angles of attack that Anthony demonstrates in the video above...where there are in essence 4 separate cracks per angle, (a compound pronated, an elliptical pronated, a compound supinated, and an elliptical supinated.) and try to continually increase the smoothness between the angles and the grip orientation.

I am not the only person to switch back and forth, and while I’m the only person I know to devote as much time to the even transition between the two, I doubt I’m alone in this practice. But why switch at all? Why favor one over the other? When should one use one over the other? And why exactly does Rolling Loop exclusively uses one and Tibetan Wave the other? That last question I’ll answer in greater detail in Part Four and Five and the remainder of this essay will discuss my approach to the pronated and supinated orientation.

I started my exploration of the bullwhip using a predominantly Wild West Arts technique. That’s what I first learned and the people I was learning from used an entirely pronated orientation. The attitude toward using the supinated orientation was that “Damned upside down thing DeLongis does!” and there was also a common misconception in circulation that using a whip in that orientation broke down the transition zone on a bullwhip. So I listened to those “authorities” and avoided experimenting with it, even though it seemed completely counterintuitive to me. The whip seemed to be under less tension in the supinated “Rolling Loop” orientation, and as we talked about in terms of structure, using the whip the way I was taught seemed to be like bending your fingers backward. It seemed to me that would break down that inner structure more than Rolling Loop.

So, I once again went to the authorities and asked a couple fine whipmakers whose opinions I hold in high regard. My suspicions were confirmed that it didn’t matter what orientation one used. It wouldn’t hurt the whip, and it didn’t make a difference which way I used it.

But there is obviously a qualitative and quantitative difference that is significant enough that DeLongis Rolling Loop exclusively uses one and Lew’s Tibetan Wave exclusively uses the other, and again, all that goes back to the structure discussed in Part One.

Just a refresher, the strands on the ventral side of the whip INSIDE the curve behave similarly to the flexor tendons in the hand, and the strands on the dorsal side of the whip behaving similarly to the extensor tendons.

Try this analogy: extend your arm directly out in front of your body so that it is parallel to the ground and relax your hand.  If the hand is oriented in a pronated position and relaxed, the tips of the fingers curl under toward the ground. If you rotate your forearm so that the hand is supinated, the fingertips generally point ahead of you.

A whip will follow this same pattern so that if you consider your “target” to be out in front of you, cracking the whip in a dorsal-side-up pronated orientation will result in the whip passing through the target to reach a point of rest, as the “flexor” strands of the underside of the whip have a natural state that is curled under.  Pronated cracks tend toward a “Slashing” type of motion.

When cracking in a ventral-side-up supinated orientation, the whip extends out to the target, and the “extensor” strands on the underside of the whip have it almost fully extended straight to it’s natural point of rest. Supinated cracks are more of a “Thrusting” type of motion.

Anthony has described his Rolling Loop technique as the only whip training system that can stab. I don’t know if it is the ONLY one, but it’s certainly the only one I’ve yet encountered, (apart from the Circle Model, and as I borrowed it directly from Rolling Loop, that hardly counts.)  Also, as an interesting phenomenon in biomechanics and technique, when one is performing a thrust to stab an opponent with a sword, especially in historical European sword techniques, thrusts are typically, (though not always,) performed with the fencers hand in a supinated orientation.

An easy way of looking at it is that pronated cracks hit harder than supinated cracks.  This is a somewhat simplified way of looking at it. I will discuss this in greater detail in Part Five when I discuss Tibetan Wave and Ron Lew’s Kung Fu/Tai Chi exploration of Yin/Yang flow of energy along the length of the whip.

In Summary:
 
  • The “Ideal” whip-crack is one that uses minimum effort for maximum output.
  • In its simplest form, the ideal whip crack can be described as a 360-degree circular movement through a flat, 2-dimensional plane.
  • The 360-degree movement of the whip can be divided into two 180-degree phases: the load phase and the throw phase.
  • The Load Phase is the first 180-degrees of the crack in which kinetic energy is imparted to the whip.
  • The Throw Phase is the second 180-degrees of the crack in which the kinetic energy loaded into the whip in the throw phase begins to roll down the length of the whip, accelerating into the crack. 
  • There are two types of crack in the MACH ONE Circle Model: The Compound Crack and the Elliptical Crack
  • Compound Cracks use a compound arm motion and the whip travels along the same path during the Throw phase into the crack as it did in the “Load Phase.”
  • Elliptical Cracks use an elliptical arm motion and the path of the whip forms a continuous loop.
  • The two dimensional plane that the whip can be visualized to travel in can be rotated and moved to almost any area around the body.
  • All of these planes can be explored with either type of crack with the whip oriented to either a pronated or supinated alignment along the cracking plane.

As stated earlier, the Circle Model does not exist in a vacuum, and I want to begin to explain how all of these different approaches are connected. Next week, I break down Anthony DeLongis's "Rolling Loop" system of training and approach and how it works to meet the goals it was designed to achieve.

​Thanks for reading.

0 Comments

The MACH ONE Model: The The Physics and Flow of a Bullwhip (Part 2 of 5)

3/25/2021

0 Comments

 
In Part One of this series, I discussed in great and tedious detail the construction of a whip using videos and website descriptions from two amazing whip makers as the primary references.

In this essay, I wish to discuss HOW that structure, the steady taper, reduction in mass, and physics allow the whip handler to accelerate a small portion of the end of the whip beyond the sound barrier and make a small sonic boom with only a minimal amount of force and effort.  It’s admittedly still hard for me to wrap my brain around even today; I barely lift and extend my arm, and that motion is amplified and focused to such a degree that the tip of the whip reaches a minimum speed of about 770 miles per hour.

Let me just say again for the record that my “Advanced Degree” is in communications. ANYTHING I know about engineering and physics is gleaned from brilliant minds who operate on a level of understanding that I can only see the shadow of. So in order to explain and illustrate the details of the process far better than I ever could, I present an amazing video that says everything I WOULD want to say if I really understood all of it.  
This is an episode of the web series “Smarter Every Day” with Destin Sandlin, an American engineer who created the program to share his love of and excitement about scientific principles with amateur folks like me, (and if you’re an armchair scientist like me, you should DEFINITELY subscribe to his channel!) His guest in this episode is, dancer, choreographer, flow and fire artist, Guinness World Record holder, world-renowned whip artist, and Rocket Scientist, April Choi, (seriously, she’s an engineer with a Masters Degree in mechanical engineering, and is currently working for NASA. She’s a 21st Century “Buckaroo Banzai”)

So, if you haven’t already, go ahead and watch the episode...THE WHOLE THING...It's fantastic...

I’m a video professional who has dabbled in 3D modeling and animation since the mid-’90s, and the high-speed photography process and 3D motion capture are processes I’ve wanted to use for YEARS now to study the motion and dynamics of a whip. The setup I had in my head is the equivalent of Neanderthals banging rocks together compared to the brilliance of their experiment design.

This touches ALL the bases I always want to cover. In fact, it does so amazingly well that this essay in the current series won’t be as long as the previous one, which spent a lot of time just establishing the terminology that I’m going to use from here on out.
 
I’d already read the earlier studies they mention in the video and had been in touch with one of the mathematicians who modeled the movement of the whip in the studies from the University of Arizona in the early 2000’s Destin mentions in the video. I also recently had the opportunity to ask April a few questions about whip dynamics.

To summarize the basics, (which if you’ve already watched the video and/or read the “Supersonic Whips” section of this website, this will be review), whips are big, flexible levers. The energy you put into the handle-end is greatly amplified at the popper-end. Due to the structure of the whip as defined in the previous entry, those densely braided layers of leather or nylon are tightly packed, so friction between strands and between layers, while present, is negligible. So, we have a continuous “Channel” for the kinetic energy we impart to the whip through the motion of our arm and hand. So, energy isn’t being lost in a significant amount as the “wave” of kinetic energy rolls down the length of the whip, BUT the whip is steadily reducing in diameter and mass along the length to the tip. Consequently, the speed of the wave of energy rolling down the whip increases, and the tip accelerates past the sound barrier.

I do want to point out a couple of things that the video features but doesn’t specifically mention because they are relevant to what will be further discussed in the remaining essays in this series.

Destin discusses Conservation of Momentum toward the end of the video when talking about getting smacked with his phone charging cable, and how that relates to the motion of a cracking whip. Conservation of Momentum is Sir Isaac Newton’s Third Law of Motion. What I want to point out here are outlined in the closely-related Second Law, and has to do with the Conservation of Energy and the principles of Inertia.

First of all, I want to talk about Conservation of Energy: If you took a class on physical science in primary or secondary school, this concept was no doubt drummed into you: “Energy can neither be created nor destroyed, it can only be transformed into some other form of energy.”  That’s exactly what’s happening when the whip cracks.  The kinetic energy of the whip is being transduced into acoustic energy - sound energy - as the whip breaks the sound barrier and the energy is transferred to the surrounding air.  Once the crack has occurred, the whip is essentially de-energized. 

You can clearly see this in the video of April cracking the whip. It displays structure and tension as the loop rolls down the length of the whip, accelerating into the state when it cracks - followed immediately by what you could call a semi-rigid state, with the whip fully extended for a few milliseconds. After that, the whip relaxes and fluidly follows through or bounces back, relatively slack.  The bulk of the energy is transferred to the air as the kinetic wave is transduced to sound, so between the sudden loss of energy and the shock drag from the concussion wave of the crack, the whip decelerates very rapidly.  

This principle is the basis for the appearance of danger in the whip performances of old: The whip artist sends the tip of the whip downrange toward the target being held by their lovely assistant.  The target shatters in a dazzling display of sound and fury. Wow! They have to be really accurate to do that - like a sharp-shooter! Then the whip artist wows them further by sending the tip of the whip out toward the lovely assistant and it cracks with the same sound and fury that obliterated the target just seconds before. But the whip only gently and elegantly wraps itself around the outstretched arm of the lovely assistant, leaving not a mark or a blemish on their bare skin. HOW’D THEY DO THAT? Simply by where they placed the crack of the whip: Place the crack near the target, it tears it apart. Place the crack AWAY from the target - and the whip, de-energized and decelerated, simply wraps around the target in a slow, elegant arc.

Second, I want to talk about Newton’s First Law of Motion, which concerns inertia. That law states, in Newton’s own words; “Every object persists in a state of rest or of uniform motion in a straight line unless it is compelled to change that state by forces impressed upon it.”

The important part of that to our discussion is “uniform motion IN A STRAIGHT LINE unless compelled to change by forces impressed upon it.”

Note that in the video that during the motion tracking experiment, there is a long strip of white marking tape along the floor defining the path that the whip should take and that April very skillfully keeps that whip moving straight along as it accelerates into the crack.

By the very nature of the physics involved, a well-made whip will hit precisely what it is aimed at every time unless some outside force acts upon it. All we really have to do is line everything up, start the flow of the whip, and then let it do the rest.  

Almost ALL of the problems I see people having in nailing a routine or hitting a target is that they’re trying to force the whip to do what they want it to do rather than just setting up the scenario they desire, and then letting the whip do the work.  

That is obviously easier said than done, as not everyone is as spot-on precise in placing that crack exactly where they want it like April can. But note that she is aligning the whip at the beginning of the motion, and just letting it roll on through. If you are trying to hit a target with a whip and attempt to course-correct when the whip is already moving out in front of you, it’s too late. You will probably miss, and the whip will not crack efficiently or effectively.

By the exacting construction methods and the physics involved, a well-made whip will behave consistently EVERY time. If the whip should miss its mark or behave erratically, the problem is either the environment in which you’re working or more often than not, “pilot error.” 

The next three essays of this series will explore the best methods of working with the foundational material to eliminate that pilot error; discussing how to properly set the whip up to crack the way you desire, and then just get out of its way and let that happen. Once you have those fundamental concepts down, everything else is just practice and repetition. After that, you’re primed and ready to focus whatever style of whip-cracking you want to pursue, from two-handed routines to incorporating dance, to stunt work and simulated violence, to martial arts.
0 Comments

The MACH ONE Model: The Anatomy and Biomechanics of the Bullwhip (Part 1 of 5)

3/25/2021

0 Comments

 
This post is what is essentially the first major essay in a series of four more blog posts that will define in fairly tedious detail my “Circle” model for whip cracking. This first part is really a fairly detailed look at my take on fine whip construction from AN END USERS VIEW. I am not a whip maker, and any information I am presenting on that, I’ve essentially received through conversations and questions with well-known makers of fine whips. 

This post and the next one in this series both get “deep in the weeds” fairly quickly, and will present a bunch of seemingly irrelevant details, but the significance of those details will become apparent in the third, fourth, and fifth section of this series, and will provide a fairly complete view of not only my “Circle” model, but also provide a very solid foundation to explore Anthony DeLongis’s “Rolling Loop” system and Senior Grand Master Ron Lew’s “Tibetan Wave” style of Filipino Whip Martial Arts. 
 
I recently saw a video on YouTube that the amazing whip maker Steve Townsend had made in 2019 about the natural “Coil” of a well-made whip and how essential it is to whip artistry. I have no idea how I missed it until now, as it’s the very sort of thing I generally “Geek out” over, and try to distribute and share when I get the chance, (like now in this post where I provide the link,) and it’s not as though, like so many, I haven’t spent large swaths of 2020 searching for “The End of the Internet”. Regardless of how it slipped through the cracks, I’ve seen it now thanks to my friend and mentor, Anthony DeLongis. 


Steve refers to Anthony quite often in the video, and Anthony shared it to his own Facebook page and expanded a bit on the topic that Steve presented. I myself wanted to comment with the following, which would have taken up considerably more bandwidth than Anthony’s original post.

I already have a very bad habit of making huge “Info Dump” comments on people’s walls, and I was trying to refrain because it’s incredibly rude. One shouldn’t just walk into someone’s living room and insert oneself into the conversation with a 40-minute lecture complete with a Powerpoint presentation and handouts. But I had a lot I wanted to say about it, so I decided I should use my own damned blog on my own damned website instead. It was this video that really inspired me to finally share my thoughts...As tedious and mired in details as they may be, over the next few essays in this series.

With all that said, please begin by viewing Steve Townsend’s video, linked above before proceeding because it provides an excellent framework for what I’m going to discuss. 

Let’s begin with expanding a bit on what Steve was discussing about the natural “Coil” present in all well-made whips like those he makes.

We’ll kick that off by looking at why that curve even exists in the first place. 

Around 2009-2010, I asked a couple of my favorite whip makers what caused the curve that Steve is referring to. The following is in essence what I got from them then, and from the conversations with OTHER whip makers and enthusiasts that those initial questions eleven or twelve years ago sparked. Also, please bear in mind that I myself AM NOT a whip maker, but I spend a lot of time in discussion with them, in far more granular detail than what I have attempted to condense below. So, the opinion and mileage of others may vary.

There are a number of factors that seem to contribute to the natural curvature of a whip, but a lot of it has to do with the nature of how whip makers braid their whips. 

Fine whips of the type that we are discussing here, (the type I use, and the type that Steve Townsend makes,) regardless if they are made of nylon or leather, are composed of several layers of material. There is a plethora of information available online about this, and you can read more about it in the Supersonic Whips section of my website, and I also recommend my old friend Paul Nolan’s website for some insight as to the construction of well-crafted whips. The video of the time-lapsed construction of an Indy whip and Paul’s amazing commentary will provide a bit more illumination for what I’m going to talk about.

Many fine traditional whip makers of the “Australian construction” style - Steve Townsend and Paul Nolan included - braid from a hook. As they braid their way down the length of the thong, they step further away from the hook. While the whip maker does pull each strand very tightly, the flexible thong being constructed sags in the middle, so there is a curve being subtly imprinted on it as it is braided.

Now, as Paul’s description at Midwest Whips mentions, as each layer is completed, the whip is rolled flat between two slabs of wood or marble to smooth out the tension in the plaiting and get everything to even out to promote a nice smooth taper. 

BUT that curvature, minute that it might be, is still present because one way or another, the way the whip is plaited, the strands are ever so slightly shorter on the INSIDE of the curve than they are on the OUTSIDE of the curve..

That may sound odd but consider this. The INSIDE-FACING curve of the whip is very much like driving in the INSIDE LANE of a race track. Because you are traveling in a circle of a smaller diameter, the perimeter of that circle is shorter. Consequently, you’re traveling less distance than you would by driving on the OUTSIDE lanes, (or the strands on the OUTER-FACING CURVE of the whip.) Therefore the strands are slightly shorter INSIDE the curve. So, even when the whipmaker is pulling equally tight on all strands on all sides, the whip has a tendency to curve back under in that direction.

As the diameter and length of the whip is built up with each consecutive layer, that VERY subtle curve that’s being braided into the whip is reinforced, (each layer is built up over the last one with the whip “sags” in braiding, falling into the same alignment as it had over the previous layer.

AGAIN, this curve that is being “reinforced” over consecutive layers does not seem significant. I’ve had both whip makers and whip performers I know and greatly respect tell me that the curve the braiding process imparts to a whip is negligible, and as I said I am not a whip maker myself. BUT consider this:  Many whipmakers who have limited space to work in, or are making whips of 12-15 feet and longer often choose to braid from a vice rather than a hook.  With a vice, the whip maker is typically braiding short sections at a time, and then moving the whip further down the length on the vice...So, the whip is curving in a convex orientation rather than a concave “sagging” one that results in braiding from a hook.  Every whipmaker I have spoken to about this has mentioned that the “braiding seam” that is on top DURING braiding from a vice ends up on the OUTSIDE curve of their whip, and ends up on the INSIDE curve of the whip when brading from a hook. So, I cannot dismiss the notion that those subtle patterns built into it consistently over the length of the whip do not manifest. As Anthony DeLongis says and we will repeatedly demonstrate in the following discussions, the whip amplifies EVERY SUBTLE MOTION that the user puts into it. That extends not only to cracking them but also in making them, and many excellent whipmakers see the necessity and value of this natural curve and often use braiding and construction techniques to promote its development and effect, aligning all bolsters, braided layers, and binding to follow this curve. 

Regardless of how it gets there, a fine whip should display a natural curve. This imparts to the whip an internal structure that is analogous to a living creature like a snake, (remember that. We’re going to come back to that again and again in this post, and in future missives on this blog.) As Steve points out in the above video, you can look at that outer edge of the curve as a “backbone” or “spine” of the whip, and conversely the inner curve can be compared to the “Belly” or “underside” of our whip.

Before we go any further, I have a confession and a VERY brief rant. I have long balked at calling that inner curve “Underside” the “Belly” because I think it can be confusing. One of my biggest pet peeves in the whip community, in general, is inconsistency. If you ask one person what a “Cattleman’s Crack” is, they MAY show you what I would have once called a “Circus Crack”, or they might show you an “Overhead Crack.” Ask about a “Fast Figure 8,” and you may see a “Circus Crack” and a “Reverse Circus Crack” combo, or you may see a “Volley.” It depends on who you ask. 

Whip “Tricks” have all sorts of names; the “Tasmanian Cutback”, “The Queensland Flash,” the “Fargo Flash”, the “Coachman’s Crack”...The list goes on and on. ALL of those tricks are made up of ONLY two moves. I’ve talked to budding whip crackers who have said “I can do X and Y, but I can’t do Z…” (insert whatever whip trick you like...As I say, they’re pretty interchangeable,) And I’ve pointed out that Z is nothing but X at a different angle, or on a different side of the body and when I demonstrate and they try it, the look on their face is like I’d just shared some great answer to the universe with them.

Those two moves are just arranged in different orders and performed in different planes to produce those “Tricks.” In fact, I think that the greatest of the many contributions that Anthony DeLongis’s “Rolling Loop” system has made to the art of whip cracking is codifying the angles, planes of motion, and musculoskeletal actions of cracking the whip into a standardized terminology. With it, we’re all on the same page with what we’re talking about. A “Cattleman’s Crack” may be referring to either a “Circus Crack” or an “Overhead Crack”, but a Compound Vertical Forehand reduces all uncertainty in the discussion, (as long as you have studied Rolling Loop, but more on that at a later date with a more detailed analysis of Anthony’s system in Part 4 of this series.) 

So, what’s that got to do with calling the curve “Spine” and “Belly”? 

Well, “Spine” works fine as far as I’m concerned. My issue WAS with “Belly.” The “Belly” of a whip to me is any of the braided layers beneath the “overlay” (the outer layer of the whip.) 

For example, it would be common for you to find a description on a whip makers page that would describe an “Indiana Jones”-styled bullwhip’s construction as having “a 12-plait overlay with two braided bellies.” So, when someone refers to the inside curve of a whip thong as “the belly”, my brain interprets that as some layer of nylon or leather under the overlay, and I have to pause a moment to consider the context of the conversation to determine which it is. So, in my attempts to “reduce uncertainty” in terminology, (Master’s Degree in Communication, go figure,) I chose to use a more biological/medical terminology: The “Spine” side of the whip is the Dorsal side and the “Belly” side of the whip is the Ventral side. 

Something else interesting about the terms “Dorsal” and “Ventral”; not only do they refer to the top and bottom surfaces of a whole organism, they can also refer to the top and bottom surfaces of an appendage of an organism. If you hold your arm out, palm down, nails up, the upper surface of your hand, featuring the nails, knuckles, etc. is the dorsal side of your hand. The palm side of your hand is the ventral side. 

I’m going to spend a good amount of time from here on out defining the similarities between the structure and function of our hands and the structure and function of the whip. It is a useful analogy, (don’t make a “handy” joke, Dan, don’t make a “handy” joke!) as any motion or action we make with the whip we tend to describe with our dominant hand, and when holding the whip in our dominant hand, any motion we make is amplified and reflected down the length of the whip, (I will delve into this in GREAT detail in Parts 3 through 5 of this series of essays, as I discuss my “Circle” Model of whip handling, and the aforementioned DeLongis Rolling Loop and Tibetan Wave methods respectively.)

To continue the “hand” analogy to the whip, we can look at the structure of our hands. Our fingers are designed to bend in primarily one direction. They curl inward TOWARD the ventral. If you’ve studied human anatomy for either biology or art, you understand that our measurements, while they might vary, tend to loosely follow a natural ratio. Barring physical abnormalities and uncommon variation, if you take the length of the bone in the first joint of each finger, and add it to the length of the bone behind it in that finger, the sum of the two will be relatively equal to the 3rd bone of that finger. Find the sum of the lengths of the 2nd and 3rd bone, and that will be the relative length of the corresponding metacarpal bone. You can do this for all the fingers, all the toes, and any illustrator or sculptor knows how big one should make a normal-sized torso in relation to the height of the head. This “Divine Proportion” or “Golden Ratio” is a pattern that turns up everywhere in nature: snail shells, pine cones, proportions to human anatomy, etc. Italian artist, philosopher, scientist, and father of the European Renaissance, Leonardo DaVinci, illustrated this in his famous “Vitruvian Man” drawing and is often rendered in the famous “Golden Spiral” illustration that spiraling coils that a well made with will naturally curl into when laid flat, (More on that later.)

For a much better illustration of how this works, I recommend checking out Jeff Grant's great section on the Science Friday website about the Fibonacci Sequence in nature (and EXPECIALLY check out that animated GIF in Exercise 1 titled A model of the Fibonacci Sequence unrolling, and note how that roll out EXACTLY models the unrolling of the whip Steve Townsend demonstrates in the video posted above.)

As stated, fingers are really only meant to bend inward toward the palm. You can stretch them, backward to a degree. In fact, you probably should when preparing for an exercise involving your hands like sports, yoga, martial arts, or playing a musical instrument, but one has to be careful not to hyperextend them. The whip works exactly like this as well, and repeated stress to any whip being forced to hyperextend - flex BACKWARD against the natural curve - will damage the whip, possibly beyond repair just as surely as if you were to bend your index finger back to touch your forearm. Now, flexibility is a relative thing. Bending backward along the dorsal orientation for fingers CAN, as stated, be beneficial for warm-up purposes, and an individual’s flexibility can be increased with controlled practice...and there is a medical condition known as hypermobility in which people can often flex their fingers and even spine’s backward almost double, (often called “Double jointed”) The amount of natural flex a well-made whip will exhibit will vary from maker to maker and whip to whip, depending on the design and purpose that whip was crafted for.

This brings us to the biggest apparent difference in the Wild West Arts community’s traditional approach to whip cracking and the Rolling Loop system that Anthony DeLongis developed. That “curve-up” vs “curve-down” approach. Again, there are a number of different ways people describe this. I’ve heard “With Bias” for ventral-side-up and “Against Bias” for dorsal-side-up. I’ve heard “Natural” for ventral-side-up and “Inverted” for dorsal-side up and I’ve heard “Right way round” for the curve-down and “that damned-upside-down-thing-DeLongis-does” for curve-up. 

These terms can be misleading and all display some bias because if I say “Inverted,” that implies that there is some natural state that has been reversed when both orientations are perfectly acceptable and useful depending on individual goals and approach. Proponents of the DeLongis method refer to “inverted” as a curve-down orientation, and proponents of the more traditional “Wild West” approach refer to “inverted” as the curve-up orientation the DeLongis method utilizes.

To speak about things in more inclusive way, I again decided to refer back to anatomical and physiological terminology. If you hold your hand palm-down, nails-up so that the dorsal side is oriented upward, then your hand is pronated. If you hold your hand palm-up, nails-down so that the ventral side is oriented upward, then your hand is supinated, (the easy mnemonic device I was taught to remember this is when the palm is up like you’re holding a platter, it’s like you’re “serving soup,” so it’s soup-inated.) The same holds true if you are laying on your back, you are supine...if you’re “prone” on the ground, you’re face-down. So, carrying on the physiology analogy, I refer to Wild West Arts “Traditional” dorsal-side-up orientation as “pronated” and the “DeLongis Rolling Loop” orientation as “supinated”.  We will discuss the exploration of these orientations in Part Three of this series. 

Another analogy we can draw between the whip and the hand is about compositional structure. Whips are made up of layers of tightly stretched, carefully woven, fibrous materials that stretch and contract with motion much like muscle tissue on the frame of the human body. Like the hand, those tightly-plaited strands of nylon or leather on the VENTRAL side of the whip, (the inner curve,) give it the preference to curl under, just like the flexor tendons on the ventral side of hand. The strands on the DORSAL side of the whip, (the outer edge of the curve,) tend to allow the whip to extend out straight, just like the extensor tendons on the dorsal side of the hand, (I first noted this similarity during my forced study of human anatomy and the musculoskeletal system during my wife’s - then fiance’s - preparation to take the Ohio state medical board exam to become a licensed massage therapist.)

Flexor tendons are designed to contract and pull. They are the tendons and muscles that allow you to close your hand and grasp objects and are the tendons that are used when you flex your bicep muscles. They are, in general, designed for more strength and power than their corresponding extensor tendons, which, as the name implies are designed to extend and expand. When you open your hand or straighten your arm below the elbow, (using the tricep muscles,) you’re using extensor tendons. Unless you focus exercise on VERY specific muscle groups, your bicep muscles are probably stronger than your tricep muscles. You can oppose more resistance with your biceps than with your triceps.  These are foundational kinesthetic concepts that are applied every day in professional sports coaching and martial arts techniques, and the pertinence of this will become more apparent as we discuss how this orientation affects how the whip cracks in Part 3, and the utilization of this phenomenon to provide an extra margin of safety in stunt work and dramatic violence in the discussion of DeLongis Rolling Loop in Part Four.  

In summary, the points from this post that you should be familiar with are:


  • The construction of the whip mirrors that of a living organism.
  • You can draw a direct comparison to the structure of a well-made whip and your own musculoskeletal structure.  
  • The whip has a dorsal side, and a ventral side, and... 
  • When cracking the whip, you can describe its orientation as either pronated or supinated.

That may seem like a whole lot of information above to just detail those four points, but the detail will come in handy in Part Three, coming next week. I promise.
0 Comments

Introduction:  The MACH ONE model (Part 0 of 5)

3/18/2021

0 Comments


Hey All!  Greetings once again from Ohio! Hopefully, the new formatting will be easier to read, as there's going to be a lot coming down the pipe of one rather lengthy post per week.  
This blog post is the first in what I currently foresee as a series of five defining what is functionally my method for practicing and teaching the art of bullwhip handling. For the last fifteen years, I have been building up a model of the motion of a cracking whip in my head: How it works physically, how it works kinesthetically, how to become more efficient at doing it, and how to effectively teach others to do it.
It’s been a crazy-paving, hodge-podge path that has been both exhilarating and VERY frustrating at times, and it is my hope that this and the next several posts will ease some of the burden for people just starting down this path that I’ve been treading on for 17 years now, and will hopefully smooth it out and give them not only a roadmap of the territory but also a solid understanding of how the region developed as it is.
I’ve said before that I’d sort of bashed about for the first 30 years of my life looking for “The THING” that would obsess me for the rest of my life; music, cars, football, etc. It just took me a bit longer. I never cared for team sports growing up, and don’t to this day. I covered a wide array of hobbies that I stuck with for a while, and even continued to enjoy into adulthood, but never just latched onto as “The Thing”: Piano lessons, guitar lessons, voice lessons, drum lessons, martial arts, European Medieval and Renaissance swordplay...The list is more extensive than this, but those are the highlights that I still have an interest in or play around with regularly, but never really focused on. 
Then on my 30th birthday, after courting a fascination and experimentation with the bullwhip since early childhood, I pulled the trigger and began my journey of working with high-quality kangaroo hide bullwhips and the proper technique to use them. The “Cliff Notes” version of my introduction to fine bullwhips through Gery Deer and my resulting obsession can be found on the “About Me” page on this website if you’re so inclined to read it.
Those events coincided with either the best or worst period of my personal growth for them to occur. I was in grad school studying mass communication and media criticism and was teaching college classes in multimedia production. My days were spent breaking down complex ideas and technological processes into easy-to-understand pieces to present in class. In the evenings, I was studying Media Theory, which was a very specific multidisciplinary subject about technology, psychology, and culture from a post-modern deconstructionist perspective. All of those meticulous habits of looking at information on a more granular level and that obsession with finding the devil in those details quickly became applied to my exploration of the bullwhip as well. 
I always describe the process of learning to properly handle a whip to be like performing an archeological dig, (the irony of the Indiana Jones analogy here is purely intentional.) There is no completion. It’s a process. It’s an excavation. You uncover an entire civilization, and think that you’ve cleared the whole area. But then you find a little nub of something off near the perimeter of the dig that you begin to clear off and find that it’s the tip of some vast structure buried far deeper than you’ve dug before. When you’ve cleared that away, you find that vast, older structure provides a fundamental foundation to what you previously believed the fundamental foundation was. You then celebrate this discovery, declaring the excavation complete. Then you find a little nub of something off near the perimeter of this now DEEPER dig, and the whole process starts again. 
I am by nature a deconstructionist. I break things down into fundamental pieces, figure out how those pieces fit together, and then put them back together to see how the parts operate as a whole. I’ve spent over 15 years doing that with the bullwhip, refining my model of not only how to do it, but why we do it that way, building up what I’ve come to call, for want of a better term, the “Circle” Model of bullwhip artistry.
I’ve been teaching it and writing about it in fragmentary form for about 6 years now, dropping little snippets of the Mach One “Circle” Model along the way, and in that time, the “Model” has grown and evolved considerably. I find that it has been very effective in rapidly building the confidence and skill level of people who have never picked up a whip before.  It’s also proven useful for people who’ve been cracking whips for a while and feel they’ve hit a wall in their progression or are having a problem “nailing” a routine or task they’ve been working on. Placing that obstacle they had encountered into the context of “The Circle” aided them in overcoming that obstacle and provided a good toolset to break down what they were attempting and determine why they were having such difficulty with it.
So, now I want to share this with others as it feels more like a complete picture than it ever has before. I feel that the only way to improve it now is to get it out there in front of other eyes...both beginners, and long-time practitioners...so that they can take it, break it apart, tinker with it, smash it against the rocks of experimentation, and share their findings with me so that we can build a better model. 
Part One will contain the foundational material that discusses the materials, construction, and “Anatomical” Structure of the whip.
Part Two will give a fairly brief discussion of the physics, motion, and wave mechanics that make a whip crack, (and I assure you, my commentary on that will be relatively brief because I am no mathematician or engineer, but I know folks who are who have contributed greatly to the filling in those gaps in my experience to further strengthen my model.)
Part Three will outline the basic tenets of the Mach One “Circle” Model of whip artistry and how we utilize our own body mechanics along with the physical structure of the whip, (discussed in part one,) and the principles of Newtonian Laws of Motion, (detailed in part two,) to make the whip crack easily and accurately.
And finally, because none of this model exists in a vacuum, Parts Four and Five will discuss two other amazing methodologies to whip arts: The “Rolling Loop” method developed for stunt work and dramatic violence/action for stage and screen by the amazing martial artist, actor, stunt performer, and Hollywood Fight Master, Anthony DeLongis, AND The Tibetan Wave system of Filipino Martial Arts, an explosive and dynamic approach to bullwhip handling rooted firmly in the highly aggressive martial arts style of Cacoy Doce Pares Eskrima, but equally rooted in the incredibly subtle, introspective, meditative, and playful form of Yang Style Tai Ch’i, developed by the equally dynamic, deadly, and playful Senior Grand Master Ron R. Lew.
These two “Whip Forms” (for want of a better term) have greatly inspired and informed my Mach One “Circle Model” from its infancy 15 years ago, and in recent years I have had the privilege of working closely with each of the developers of these two very different methodologies.  I had been great fans of their work since almost the beginning of my in-earnest study, and my INTERPRETATION of their work became the basis for my own. Then, after finally meeting them, I found out that I really didn’t know what I thought I knew, and had to go back to the drawing board to essentially “rebuild the Circle”.  
I have found the results of that improved model to be amazing, and have been planning a discussion of both Rolling Loop and Tibetan Wave for ages now because while they are rooted in the same form and structure that I will discuss in part one and two, and they were individually developed by two gentlemen who have great admiration for one another, their “Systems” for whip cracking seem extremely different...like opposite ends of the spectrum to even a skilled and experienced whip cracker. 
Yet, when one views them through the lens of the “Circle” Model, there is a huge amount of common ground that they share...and the differences in mechanics and technique have been brilliantly put in place by their developers because they each have different goals.
As you dig into Part One and Part Two of the essays in this series, please bear in mind that it is a very deep dive, and contains details that seem irrelevant and may never be of use to you as a whip artist.  Bear in mind that I am presenting it here in a linear form; presenting the individual components to the structure to synthesis. I normally do not include ALL of these individual pieces of the puzzle in my discussion and presentations, as I do not teach it linearly. I teach using a Spiral Learning methodology that has students cracking a whip in the first five minutes of instruction, and then begin to refine that information, cycling through all the material before going back into deeper and deeper detail. Like a “Deep Dive,” I start with very simple, gross motor skills at the surface, and slowly refine that, going deeper and deeper as far as that student wants/needs to go to reach their goals. The way I am presenting the information in the following series of essays really starts AT DEPTH at the foundation, (at least the CURRENT foundations. Experience has demonstrated you can always go deeper,) and work our way to the surface of actual day-to-day bullwhip practice.  So, if something gets too deep for you, read the next section, (if it’s available yet.)  When I mention any of the foundational material from Parts One and Two in Parts Three through Five, I will attempt to link back to those specific points.
And thank you in advance, dear reader, for any constructive input, commentary, and feedback you have. I look forward to reading your findings. Now, get out there, and dash all this nonsense I’m about to spout against the rocks, and then let’s get to building a better model!   
  

0 Comments

A LONG overdue review:  Kooniu Pocket Whip

2/26/2017

0 Comments

 
Picture
Coiled up pocket whip by Andrzej "Kooniu" Jasztal
More months ago than I care to admit, I got a message from Andrzej Jasztal, a Polish gentleman living in Ireland.  Andrzej is a martial artist who makes and uses whips in sparring and martial practice. He asked for my address because he had something he wanted to send me.  

I've known "Kooniu" somewhat distantly for years on a number of whip-centric internet forums; Club Obi-Wan's bullwhip forum, The Whip Basics forums, Facebook groups, etc. etc. etc. and as long as I can remember, he's been sharing the results of constant tinkering with new designs of flexible weapons for fast deployment; whip belts, his own version of the intimidating Urumi steel whips of Indian martial arts, etc. etc.  One of my favorites he shared many moons ago was a "Universal Whip" That had a removable/replaceable handle that could quickly convert between being a bullwhip, a stockwhip, and a snake whip, (for definitions of these three types of Supersonic Whip, read here.) 

Andrzej visited my website a couple years ago, read some of my experiences, and found we had a lot in common in terms of philosophy of whip-based martial arts.  I however tend to be a bit more internally focused...almost meditative in my whip practices.  Andrzej is much more focused on application, and is focused on where the rubber meets the road.  Kooniu is a very "Do it Yourself" kinda fellow, and is constantly developing new variations of those self-made whips, throwing on some padding and a mask and "Field Testing" them with fellow martial artists, and then going BACK to the workbench to fix the problems he's found in his designs. You can find more about that at his website.   

His personal style, dubbed "The Vagrant Whip" utilizes a lot of spontaneous flow and requires a lot of speed and skill.   The whips Kooniu prefers have somewhat longer handles than the whips I use, which makes carrying them around a bit complicated.  Hence this design.  I'll just shut up and post the video now.
So as you can see, it delivers, though it is a bit of a compromise, (in fact, a brief conversation with Andrzej just today, he described it himself as a "Compromise" whip.)  
Picture
Picture
The small size makes it  light and VERY quick, but its "punch" is somewhat reduced as a result.The lightweight "selfie stick" does keep it from weighing down your pants pocket, but as I mention in the video, it rotates easily and can throw the whip completely out of alignment
But in the intervening months it's taken me to get off my butt and actually DO this review, Kooniu hasn't been idle.  He recently sent me some pics of his newer design that uses a small tactical baton as the handle foundation.  This give it more mass, (and more use if you need to actually USE it as a blunt trauma weapon in close quarters,) and the aluminum sections lock more tightly together, preventing the swiveling side effect of the torque, therefore the thong of the whip stays in alignment.
Picture
image courtesy of Andrzej Jasztal
Picture
image courtesy of Andrzej Jasztal
0 Comments

New 7' HolyOak Whips Review Pt. 2

2/19/2017

0 Comments

 
Picture
7 Ft. Bullwhip in the Surf Image courtesy of Jennifer Trout
​And now onto Part 2 of the new whips review.  This one features a 7 foot, 14 plait acid green and black whip with a brass ferrule.  

This whip is just sublime  Hands down.  I'll let the video and still images below tell the rest!
Picture
7 ft. 14 plait Sonic Alignment bullwhip. Image courtesy of Jennifer Trout
Picture
Ferrule Detail. Etching by Tyler Blake of ExoWhips.com Image Courtesy of Jennifer Trout
Picture
14 plait birds-eye pattern detail Image courtesy of Jennifer Trout
0 Comments

New 7' HolyOak Whips Review Pt. 1

2/18/2017

0 Comments

 
Picture
Image Courtesy of Jennifer Trout
I've been a drummer a hell of a lot longer than I've been a whip artist, and I have some very distinct opinions about cymbals. Cymbals are the punctuation marks in the language of drums. It's a common thing for drummers to have at least two identical crash or splash cymbals mounted on either side of their set, (so they can easily reach them depending on which side they are facing.) 

I never did that. If I'm going to take up the "real estate" around my drum kit with cymbals, I want as much diversity as I can get. Two identical cymbals create redundancy and limit the variety of punctuation  I can use. If I want THAT sound, I'll hit THAT cymbal...I don't need a second.

I tend to feel the same way about "Matched Pairs" of whips, (for those not yet in the know, matched pairs of bullwhips and stockwhips are whips that are as close to being identical as the maker can get them. They are typically made simultaneously so that the maker can get their weight, flow, and particular behaviors as identical as possible. When you're talking about something ENTIRELY handmade, and in the case of leather whips out, made out of natural materials, that's a LOT harder than it sounds! They are popular with whip artists who do complex double-handed "Australian Competition" style routines. For some AMAZING examples of this, check out YouTube videos of Adam Winrich, Todd Rex, and many others.)

While I admire not only the craftsmanship required in producing matched pairs of whips, and the incredible skill required of double handed routines, neither have ever really EXCITED me as something that I wanted to focus on myself.  If I am going to invest in a whip, or have it take up space in my whip bag, I want it to have a very tangible difference to the whips around it.

That said, I'm still VERY picky, and look for SPECIFIC things in my whips.  So, when Bobbi HolyOak and I were talking about two new bullwhips for me that would have much the same mechanical stats, (both 7 foot, 14 plait with 10" handles,) I had some very distinct characteristics that I was looking for in each one separately.

I don't know how Bobbi managed to weave my mad ramblings and desires into these two amazing bullwhips, but she amazed me as usual.  These two whips are  twins, but fraternal rather than identical. 

This is a full review of the first of these two whips.  The second review is already shot, and coming down the pipe soon!  (Special appearance at the end of this video by my lovely wife, Jennifer...who graciously provided the still pictures below this review!)
Picture
Image Courtesy of Jennifer Trout
Picture
Brigid's Cross pattern braiding on handle. Image Courtesy of Jennifer Trout
Picture
Tiger's Eye stone in heel knot. Image Courtesy of Jennifer Trout
0 Comments

Tibetan Wave Whip Review part deux

2/13/2017

4 Comments

 
So, about three years and four months ago, I received a very special little tool that ended up being the catalyst by which EVERYTHING I'd done with a whip for almost 10 years by that point.

That tool was a Tibetan Wave bullwhip from Bobbi Holyoak, designed by the esteemed Sr. Grandmaster Ron Lew.

At the time, I shared a brief review of this whip with a few choice people that I have recently made available to the public, (and you can view that review if you scroll down a bit on the link provided above.)

My intention was ALWAYS to produce a longer review of the whip once I got to know it a bit better, but that review was NEVER meant to take three years. Some pretty transformative things have occurred in my approach to the whip since then, (which you can read about in my blog entry from May of 2015)

Well, as promised a few days back, I hauled my whips, my camera gear, and my carcass down to Fort Fisher to shoot some whip reviews.  Here's the long overdue one.  The others will follow in the coming days.  

Please, feel free to comment here, email me privately, join the Mach One forums and lets talk about it!  OR find us on Facebook!

Thanks much, and Happy Crackin!
4 Comments
<<Previous

    Daniel Trout

    Bullwhip artist, and instructor at MACH ONE Whip Artistry

    Archives

    March 2021
    February 2017
    November 2015
    May 2015
    April 2014

    Categories

    All
    Reviews
    Whip Artistry

    RSS Feed

Powered by Create your own unique website with customizable templates.